So you want to show how many times a product has been bought?

I used to sell digital products on Gumroad where this feature is built-in. I think it’s great for conversions. The customer sees you’re not a new business, and they’re not alone in purchasing from you. It’s just as good as reviews in my opinion.
Shopify doesn’t have this natively. There are apps that can do it, but you can also do it yourself and avoid paying for an app.
What you’ll need:
- Shopify Flow (Shopify’s official and free automation tool)
- 15 minutes
Read the tutorial below or watch the video:
Step 1: Create a metafield to hold the number of sales
Shopify doesn’t let us output how many sales each product has.
However, we can create a metafield ourselves to store the number.
- Go to Settings > Custom data > Products
- Click “Add Definition”
- Call your Metafield “Sale Count” or similar. Pay attention to the namespace and key that are generated. We will need this later.
- Select “Integer” as the type.
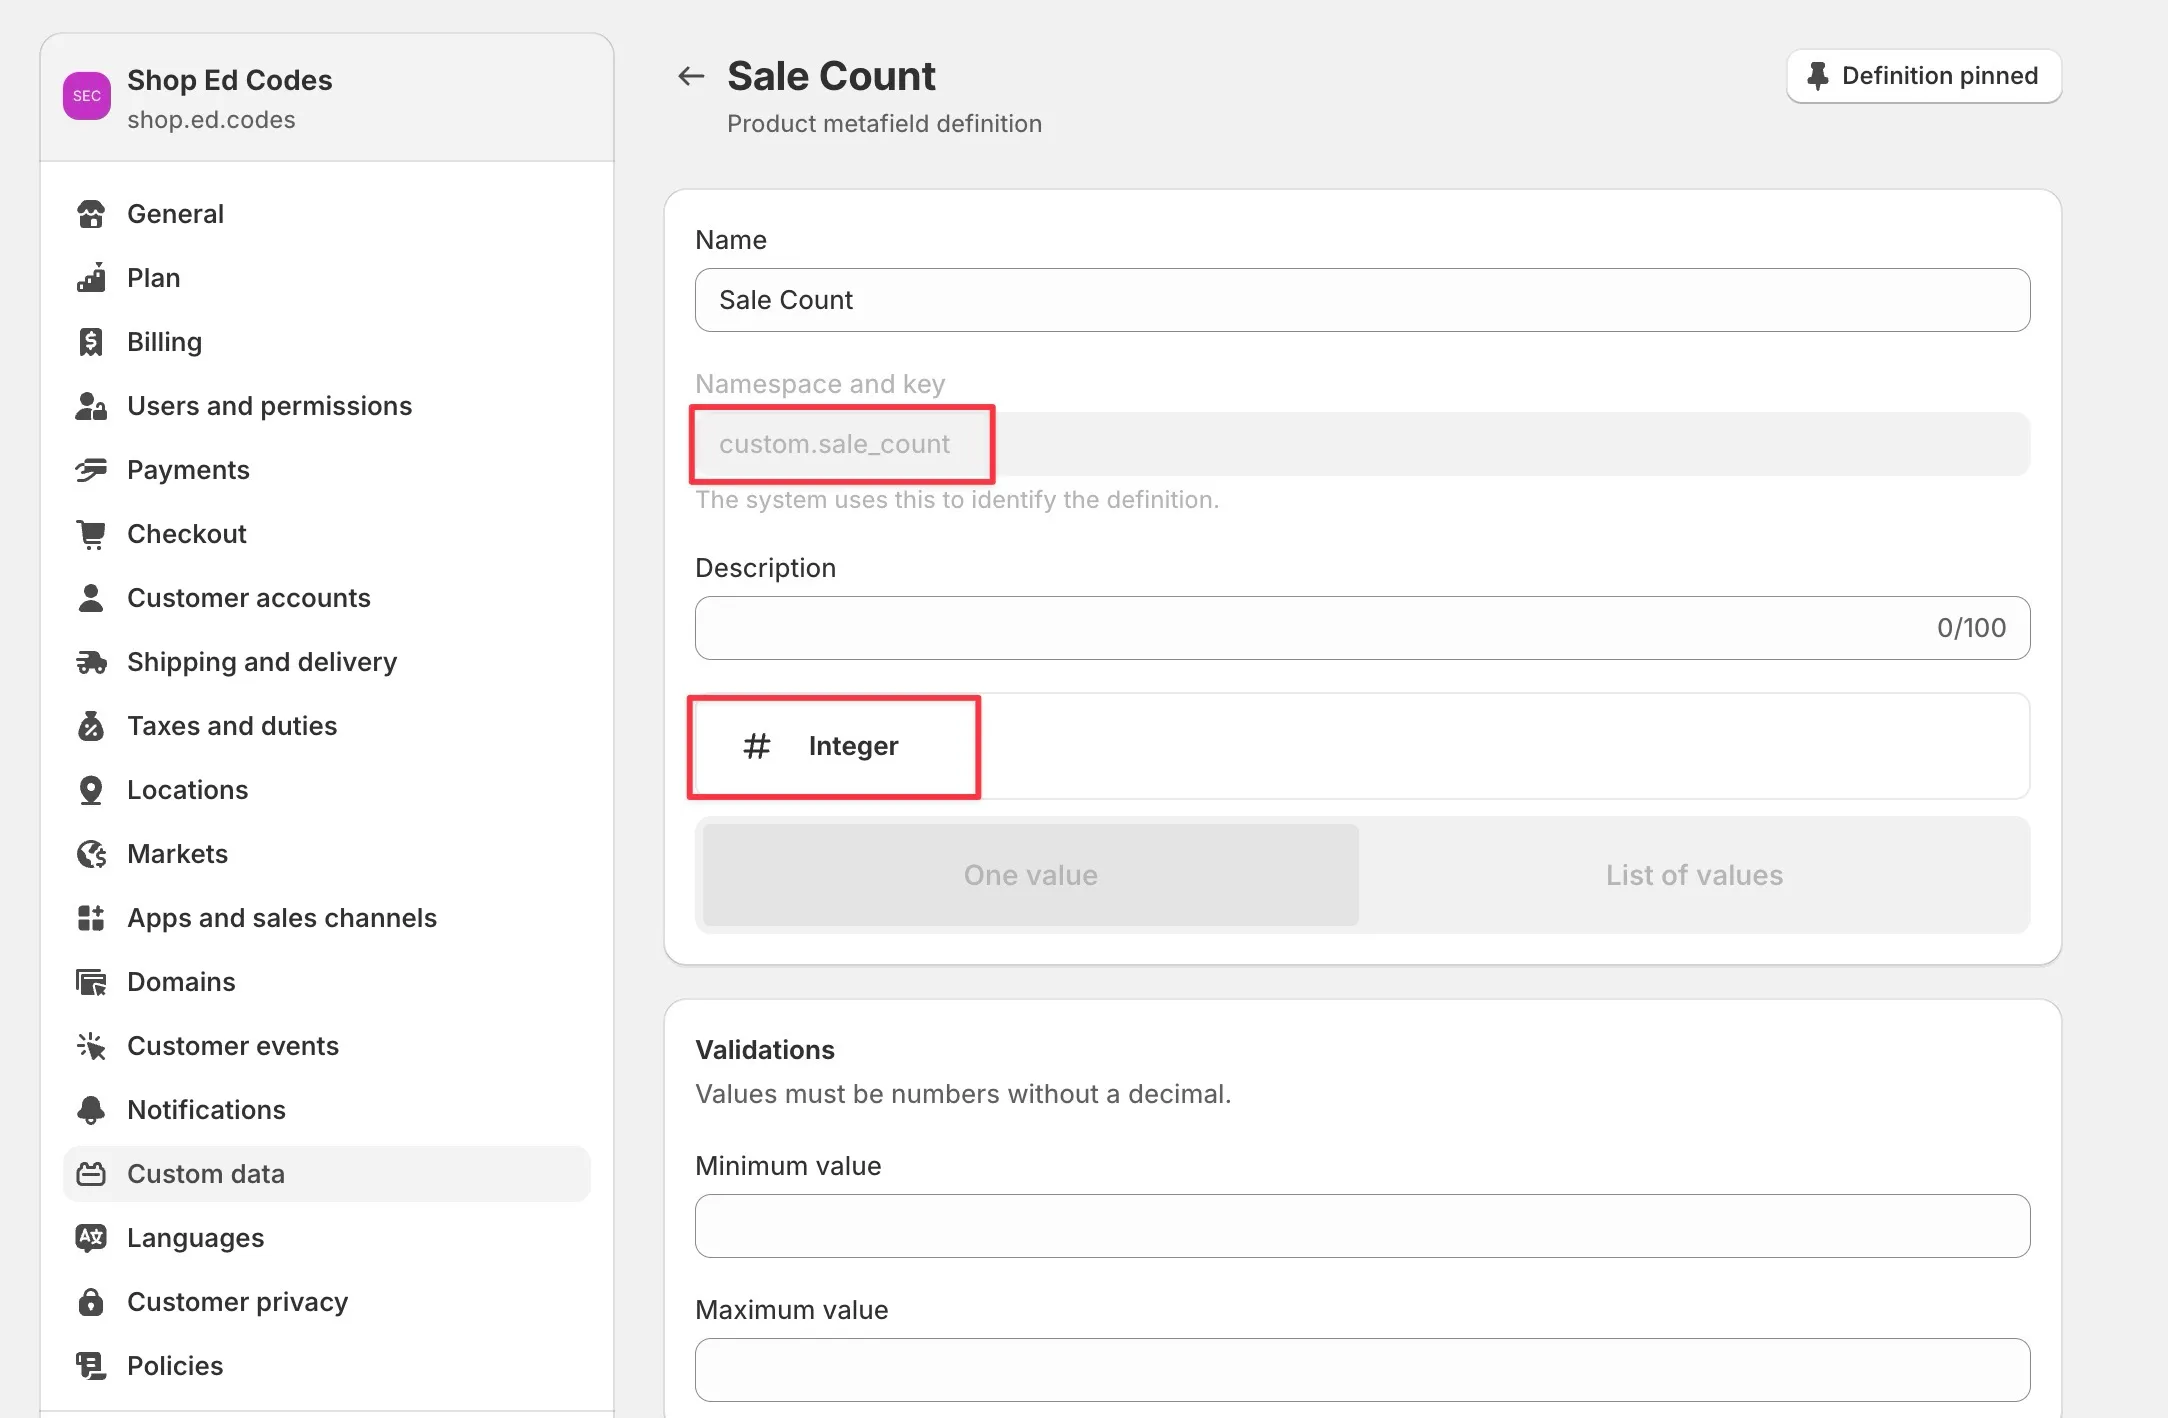
Now you will have a metafield on each product page that accepts a number. Here you can put the current number of sales.
To discover the number of sales for each product go to Analytics > Reports > Sales by Product.
Now you can go ahead and fill out the Metafields for each product. If you have lots of products, this might need to be done in Excel / Google Sheets.
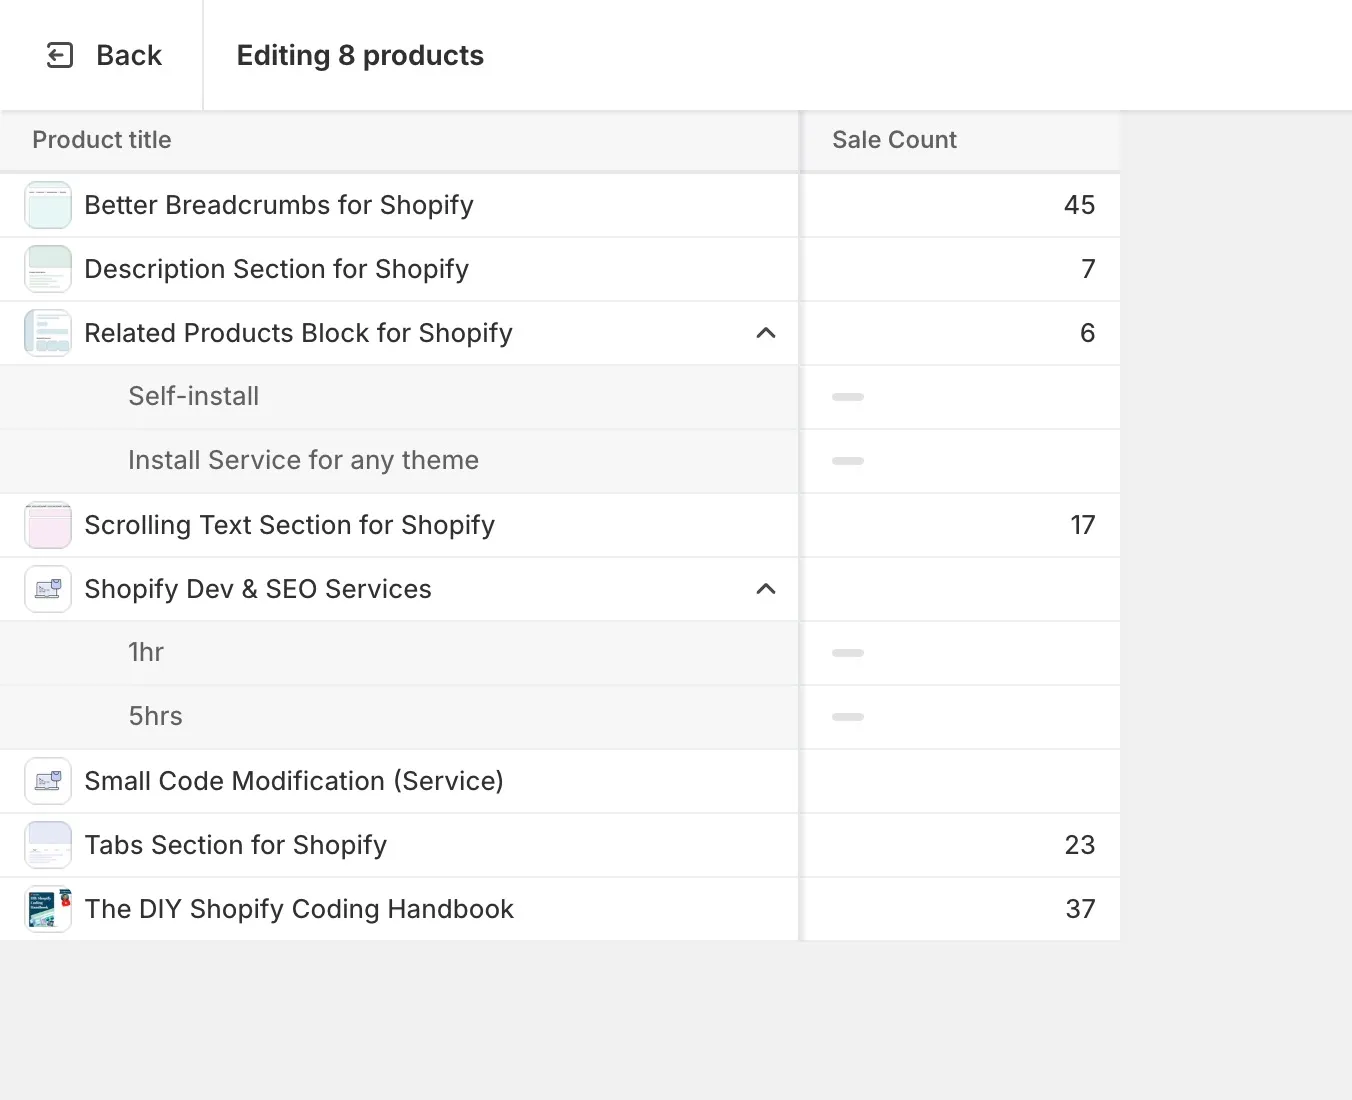
Step 2: Display the Metafield on the product page
This could be as simple as using a text block with the dynamic source button:
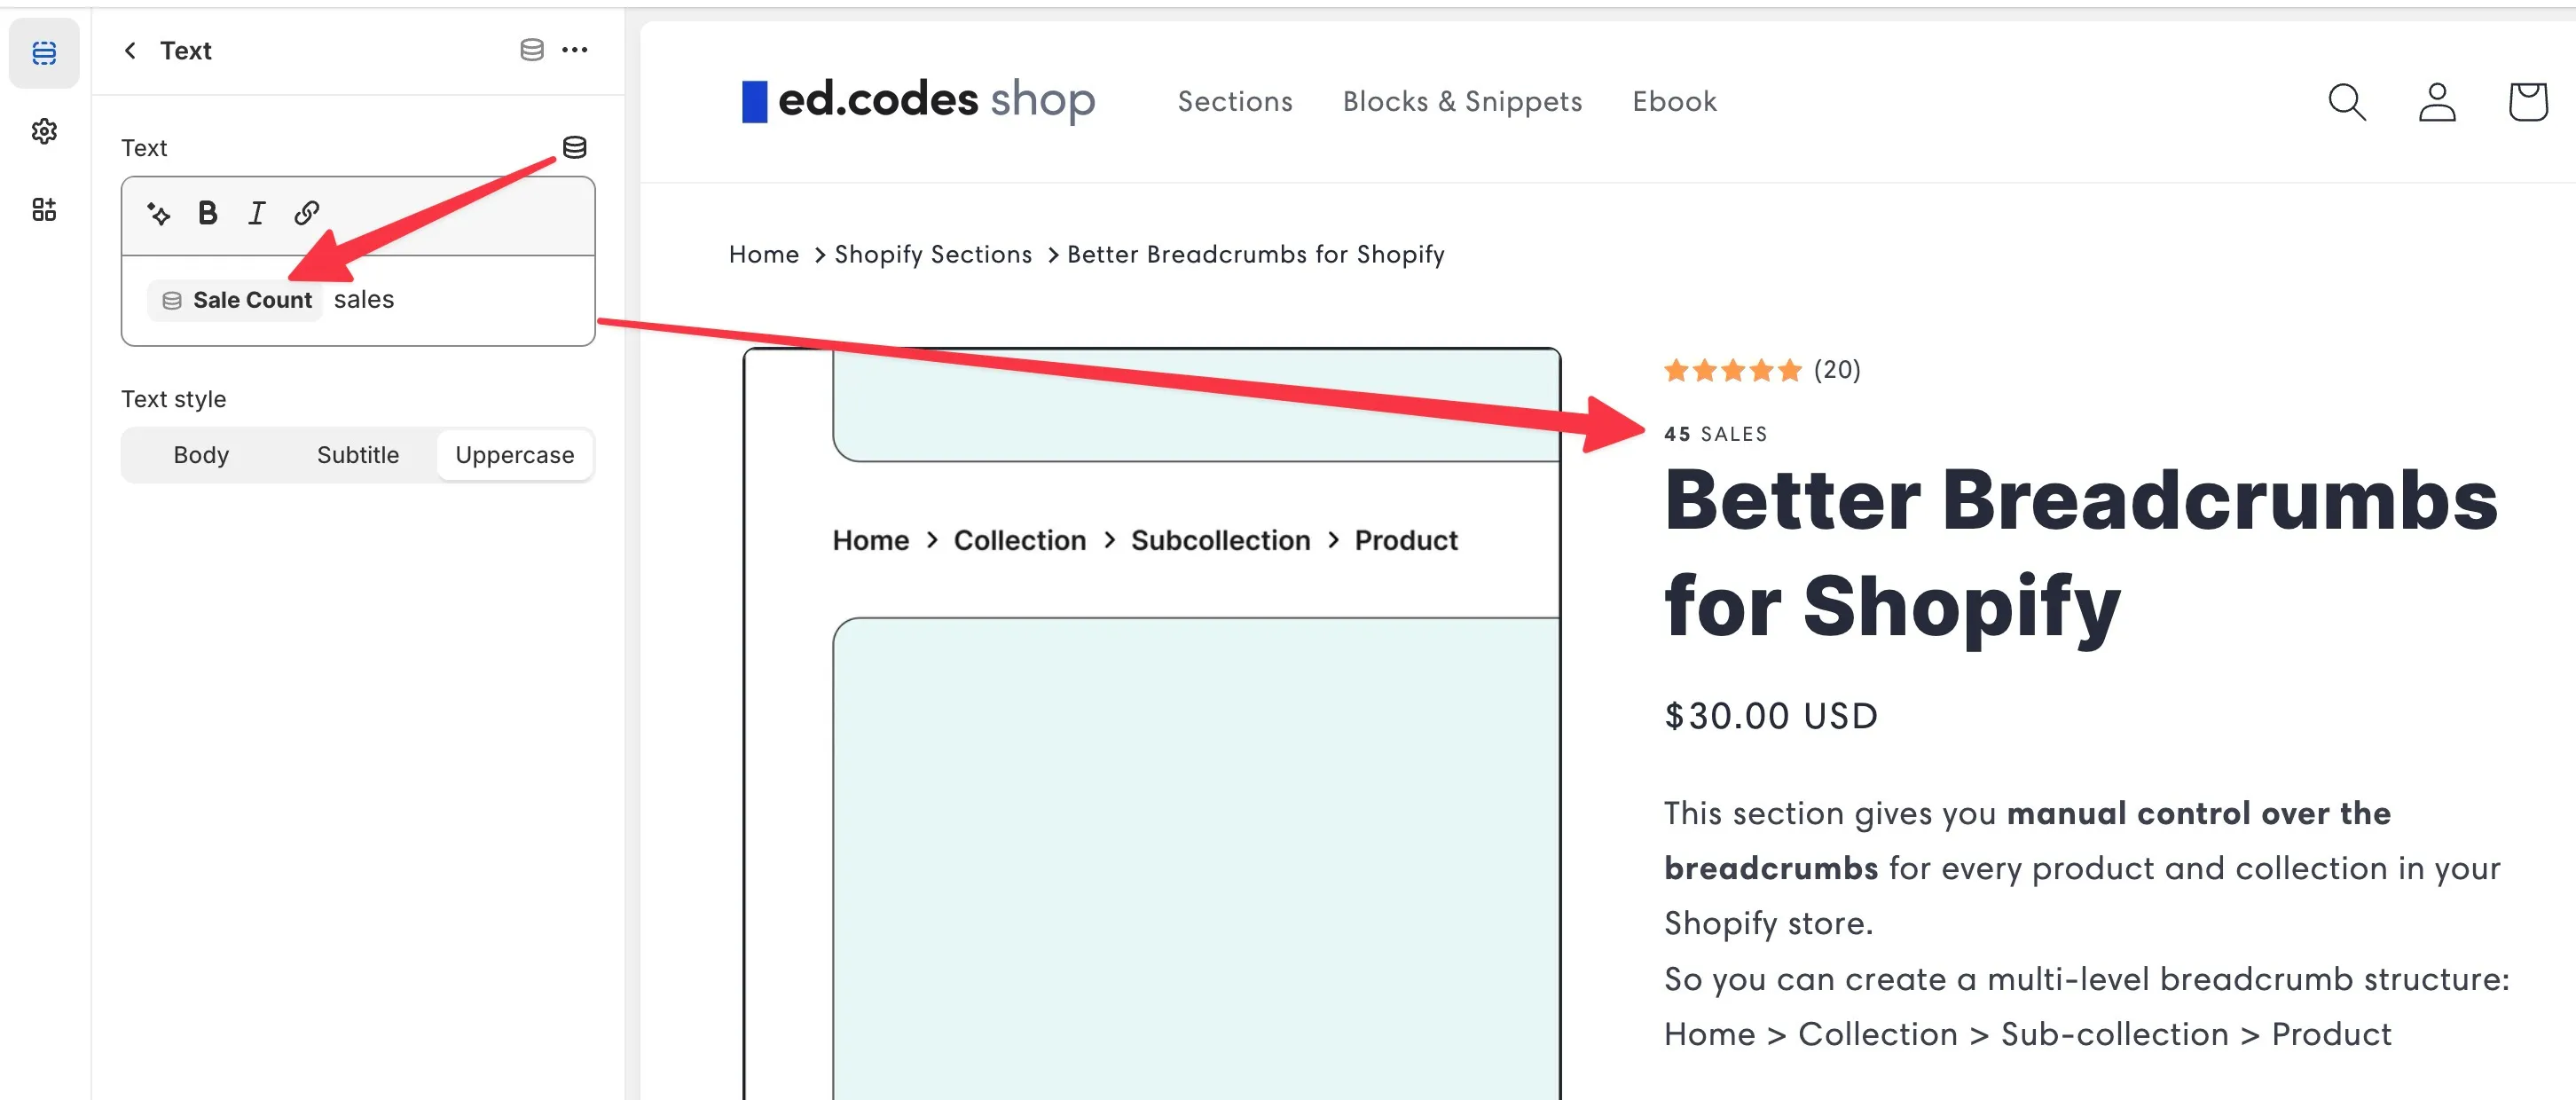
If you want a fancier design, you will need to use a custom liquid block instead. You can output the metafield like so:
{{ product.metafields.custom.sale_count }}
(Remember from Step 1 - your namespace and key might be different.)
Here is some code you can copy and paste into a custom liquid block. The result should look like this:

<div class="ed_salecount"> <strong>{{ product.metafields.custom.sale_count }}</strong> sales</div>

<style>
  .ed_salecount {
    background-color: #edf5ff;
    padding: 8px;
    padding-left: 36px;
    border-radius: 4px;
    max-width: 44rem;
    position: relative;
  }
  .ed_salecount:before {
    background-color: #8cacd9;
    content: '';
    width: 16px;
    height: 16px;
    display: inline-block;
    position: absolute;
    top: 50%;
    transform: translateY(-50%);
    left: 12px;
    mask-size: 120%;
    mask-repeat: no-repeat;
    mask-position: 50% 50%;
    mask-image: url(data:image/svg+xml;base64,PHN2ZyB3aWR0aD0iMjQiIGhlaWdodD0iMjQiIGZpbGw9Im5vbmUiIHhtbG5zPSJodHRwOi8vd3d3LnczLm9yZy8yMDAwL3N2ZyI+PHBhdGggZD0iTTEyIDIuMDJjLTUuNTI0IDAtMTAgNC40NzctMTAgMTBzNC40NzYgMTAgMTAgMTBjNS41MjIgMCAxMC00LjQ3NyAxMC0xMHMtNC40NzgtMTAtMTAtMTBabTAgNWExIDEgMCAxIDEtLjAwMSAyIDEgMSAwIDAgMSAwLTJabTAgM2ExIDEgMCAwIDEgMSAxdjVhMSAxIDAgMCAxLTIgMHYtNWExIDEgMCAwIDEgMS0xWiIgZmlsbD0iIzAwMCIvPjwvc3ZnPg==);
  }
</style>
Step 3: Use Shopify Flow to update the metafield when there is an order
This part is hard to explain so I highly recommend watching my video, but here are some notes and screenshots to guide you.
First get the Shopify Flow app. Create a new workflow.
Trigger: Order created
Your trigger will be “order created”. Nothing fancy here.
Action: Loop over every product in the order
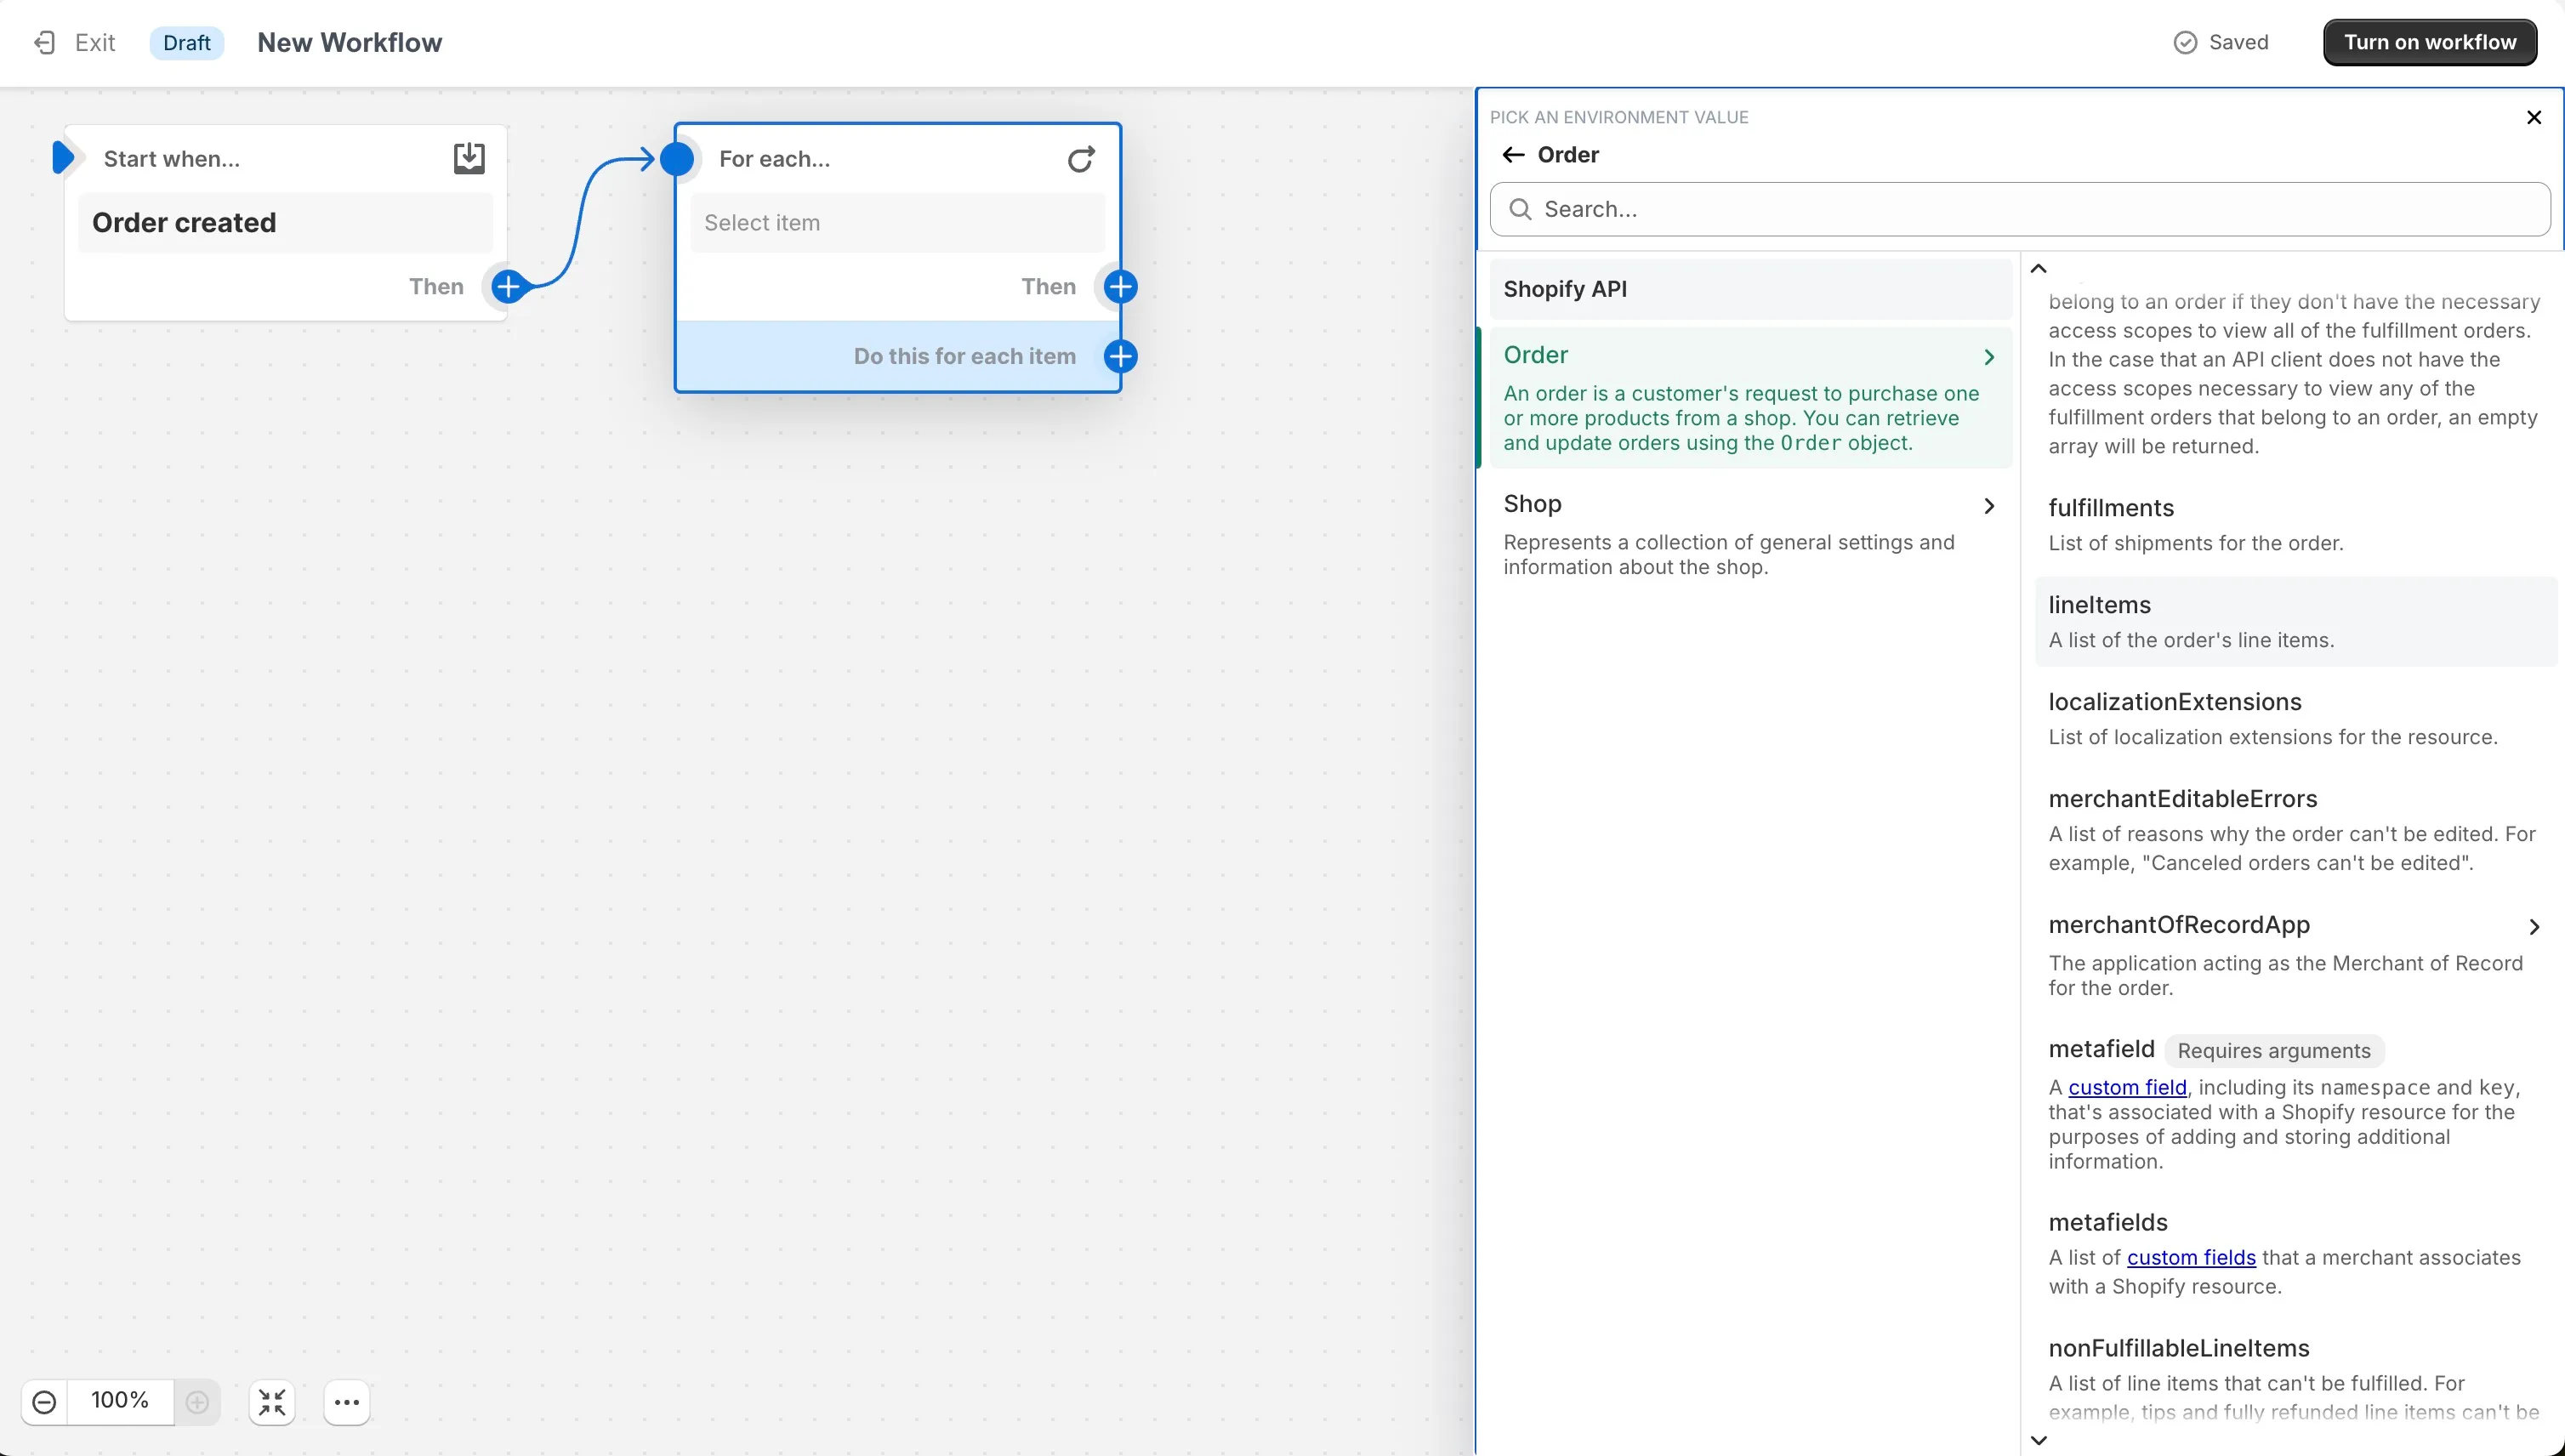
The next action is a For each loop. You will find this under the Flow actions.
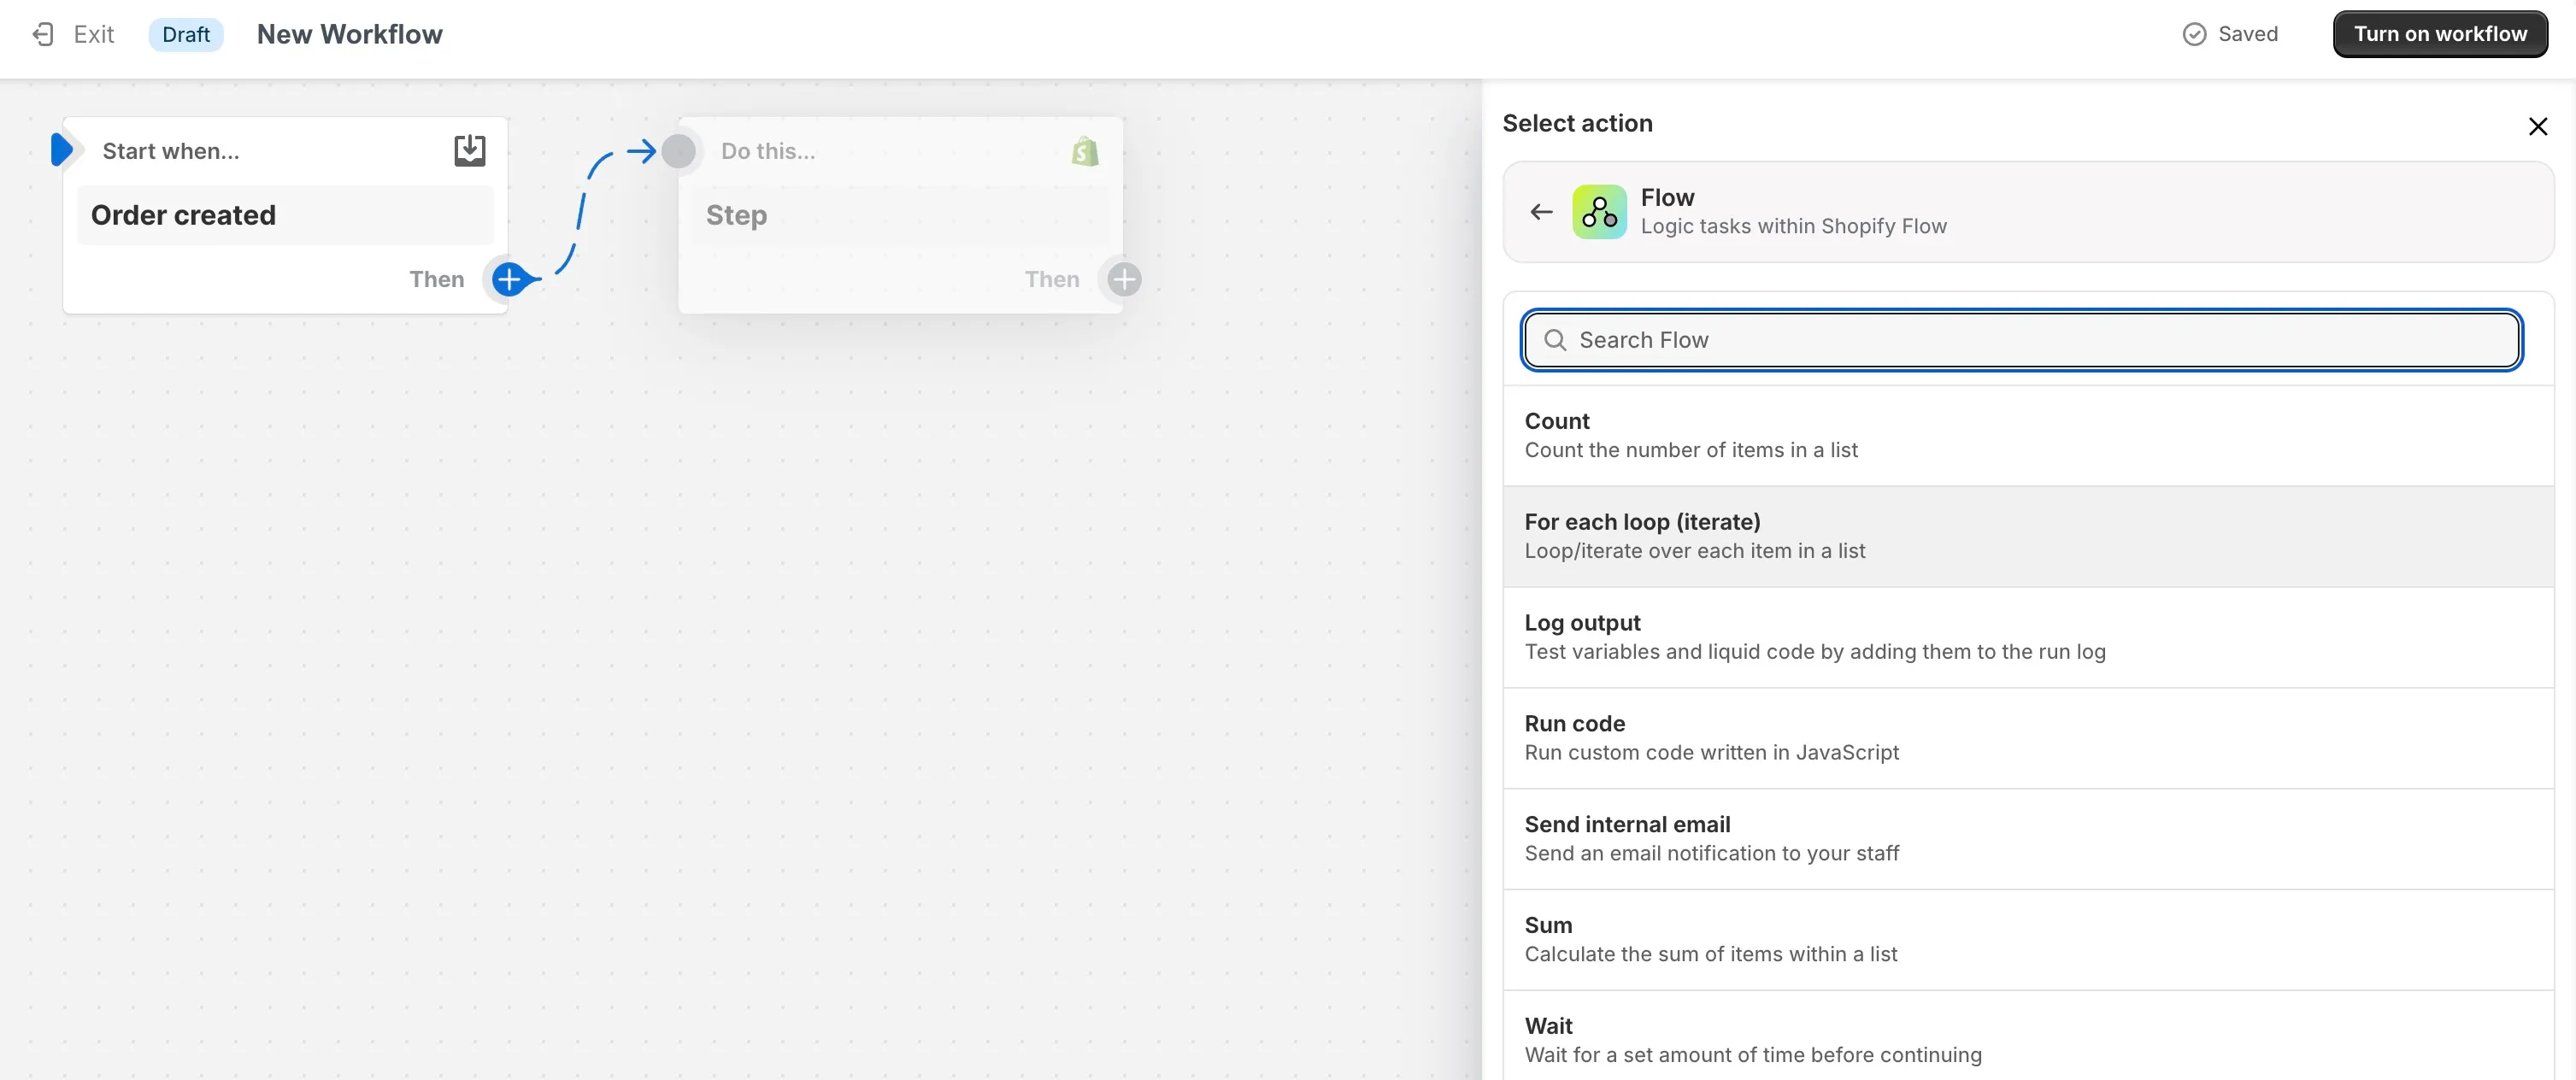
Select Order > lineItems. (A “line item” means one of the products in the order, like every line in the cart)
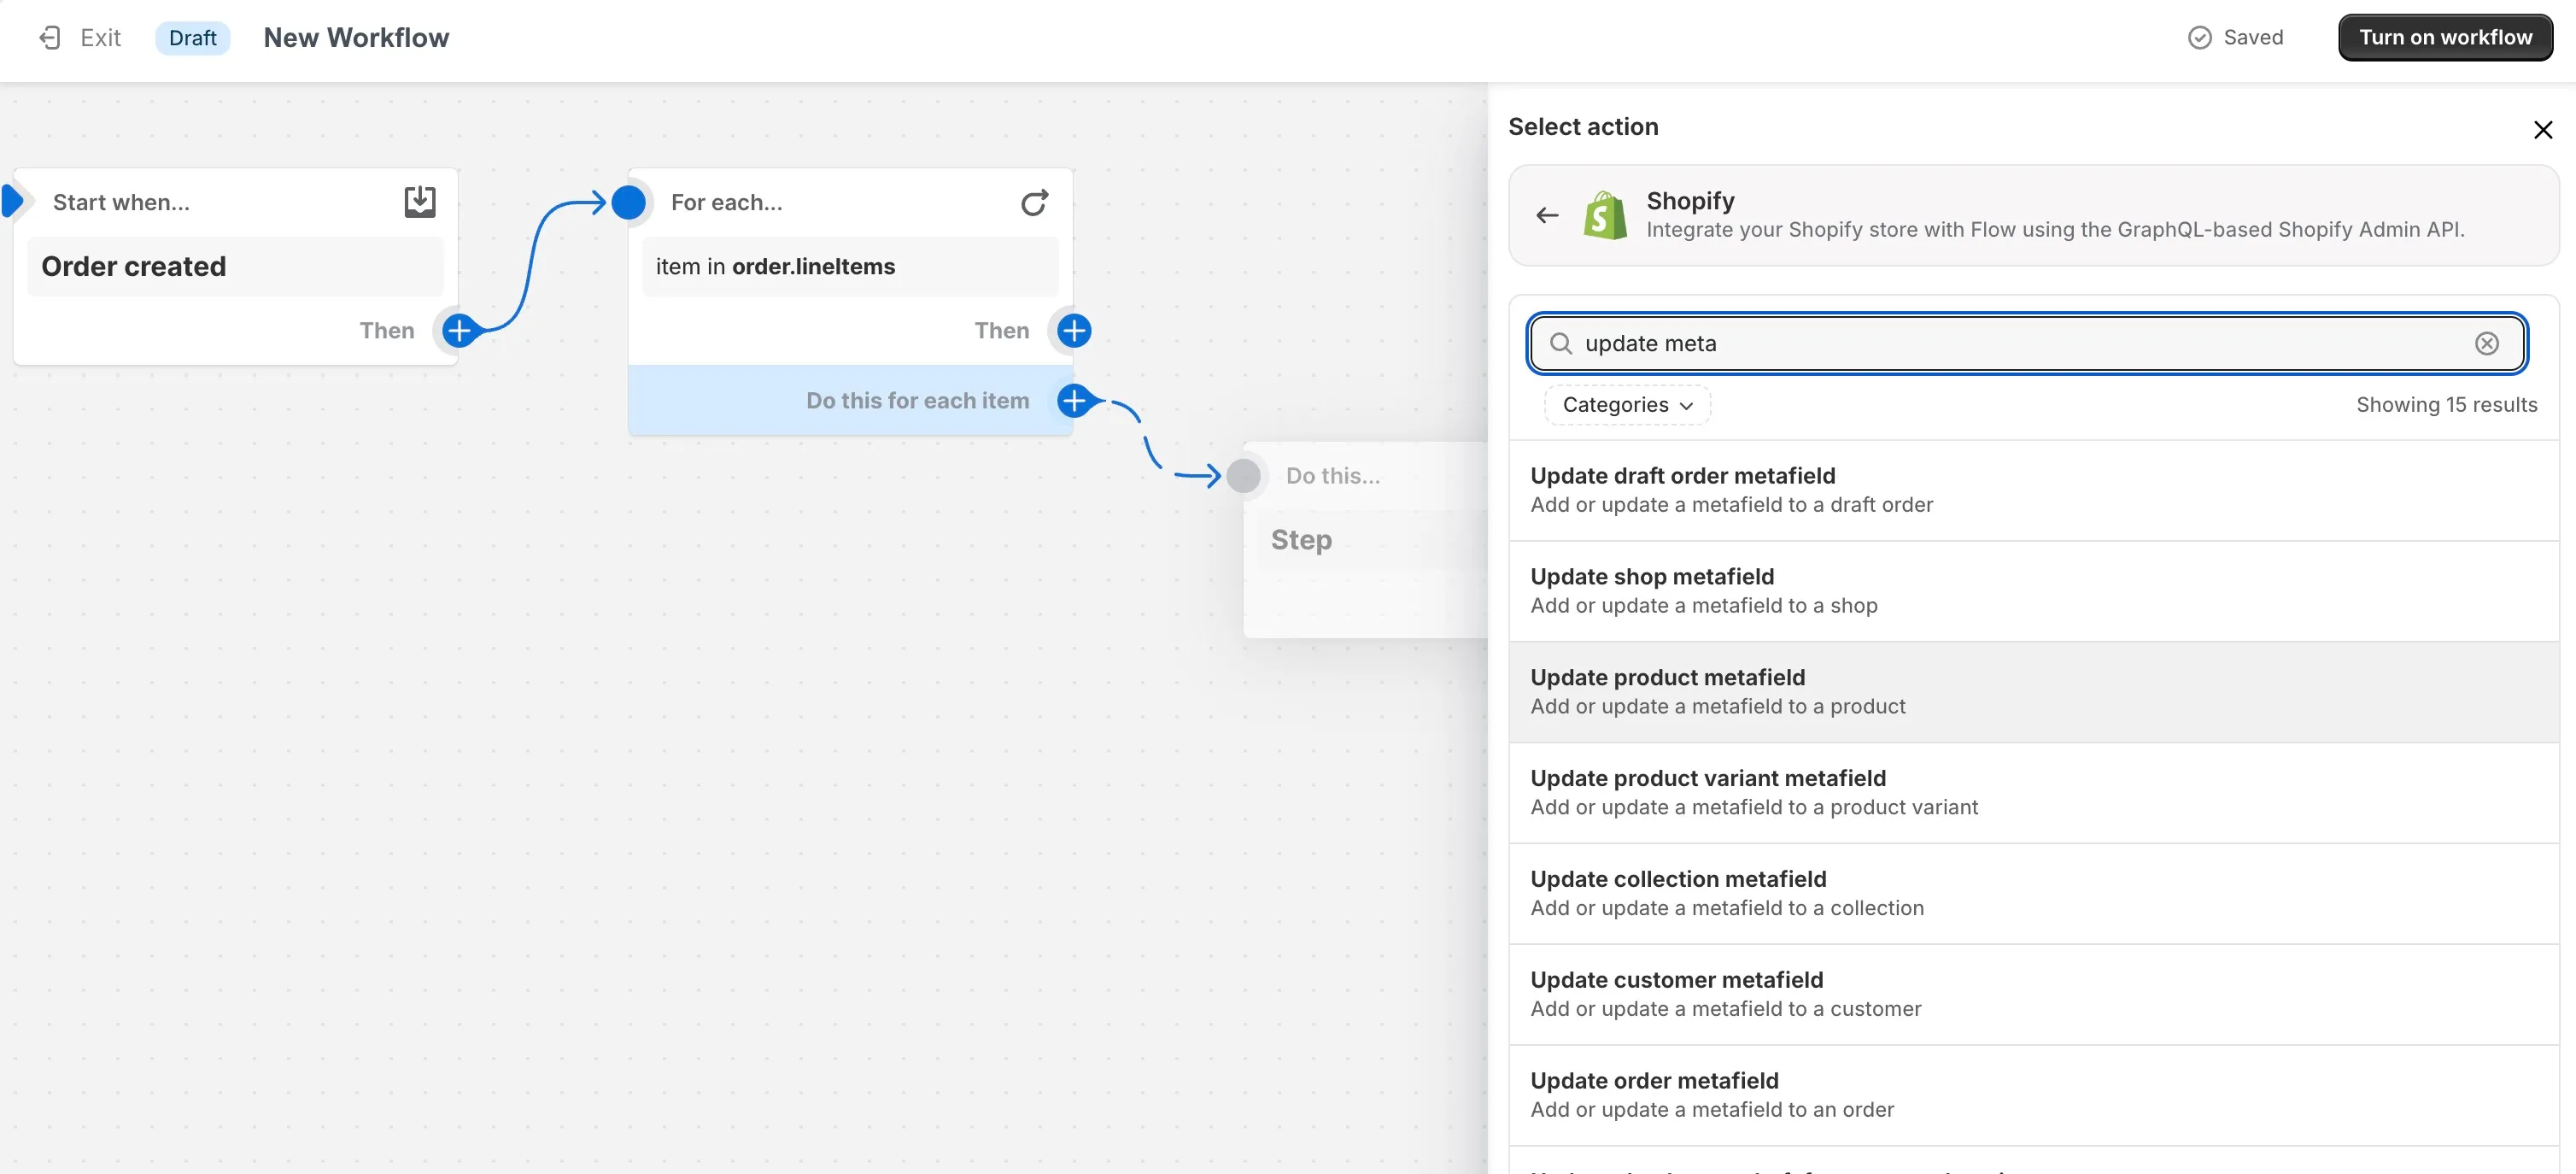
Action: Update product metafield
You can use the search bar to find the update product metafield action.
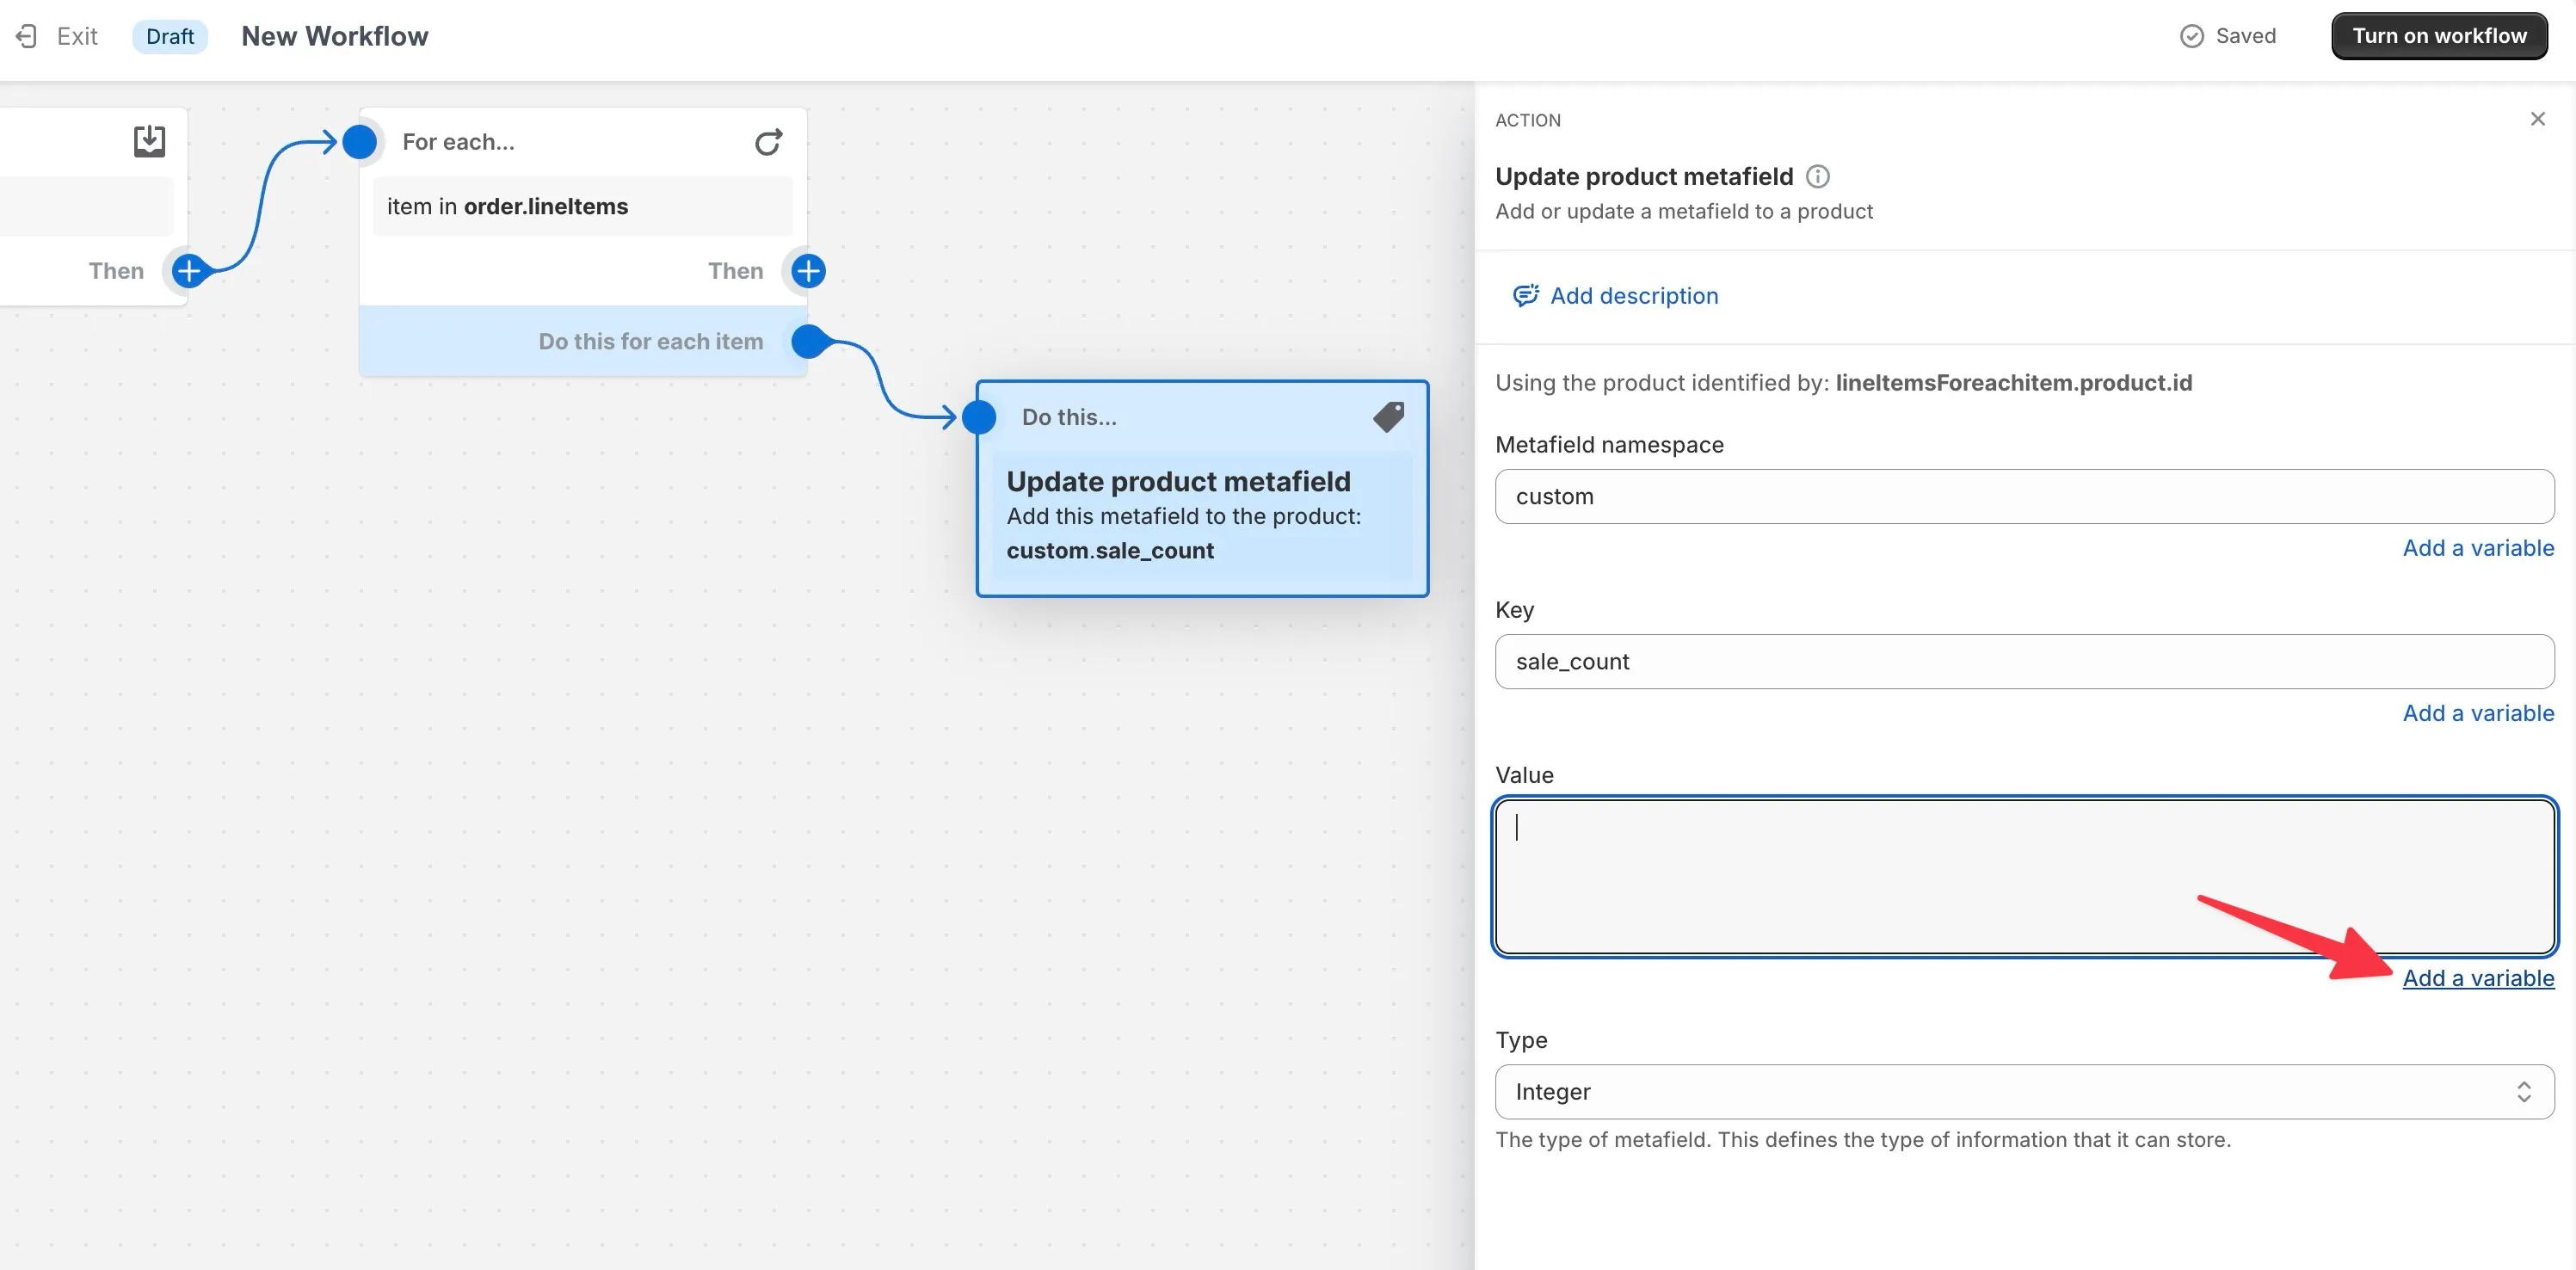
In the form that comes up, use the namespace and key of the metafield we created. Ignore value for now. Select Integer for the type.
Now for the value field, we just want it to count, right? So in other words, we just want to get the value of that same metafield, plus one.
First lets get the old value. Click “Add a variable” below the value field.
Select LineItems Item > Product > Metafield
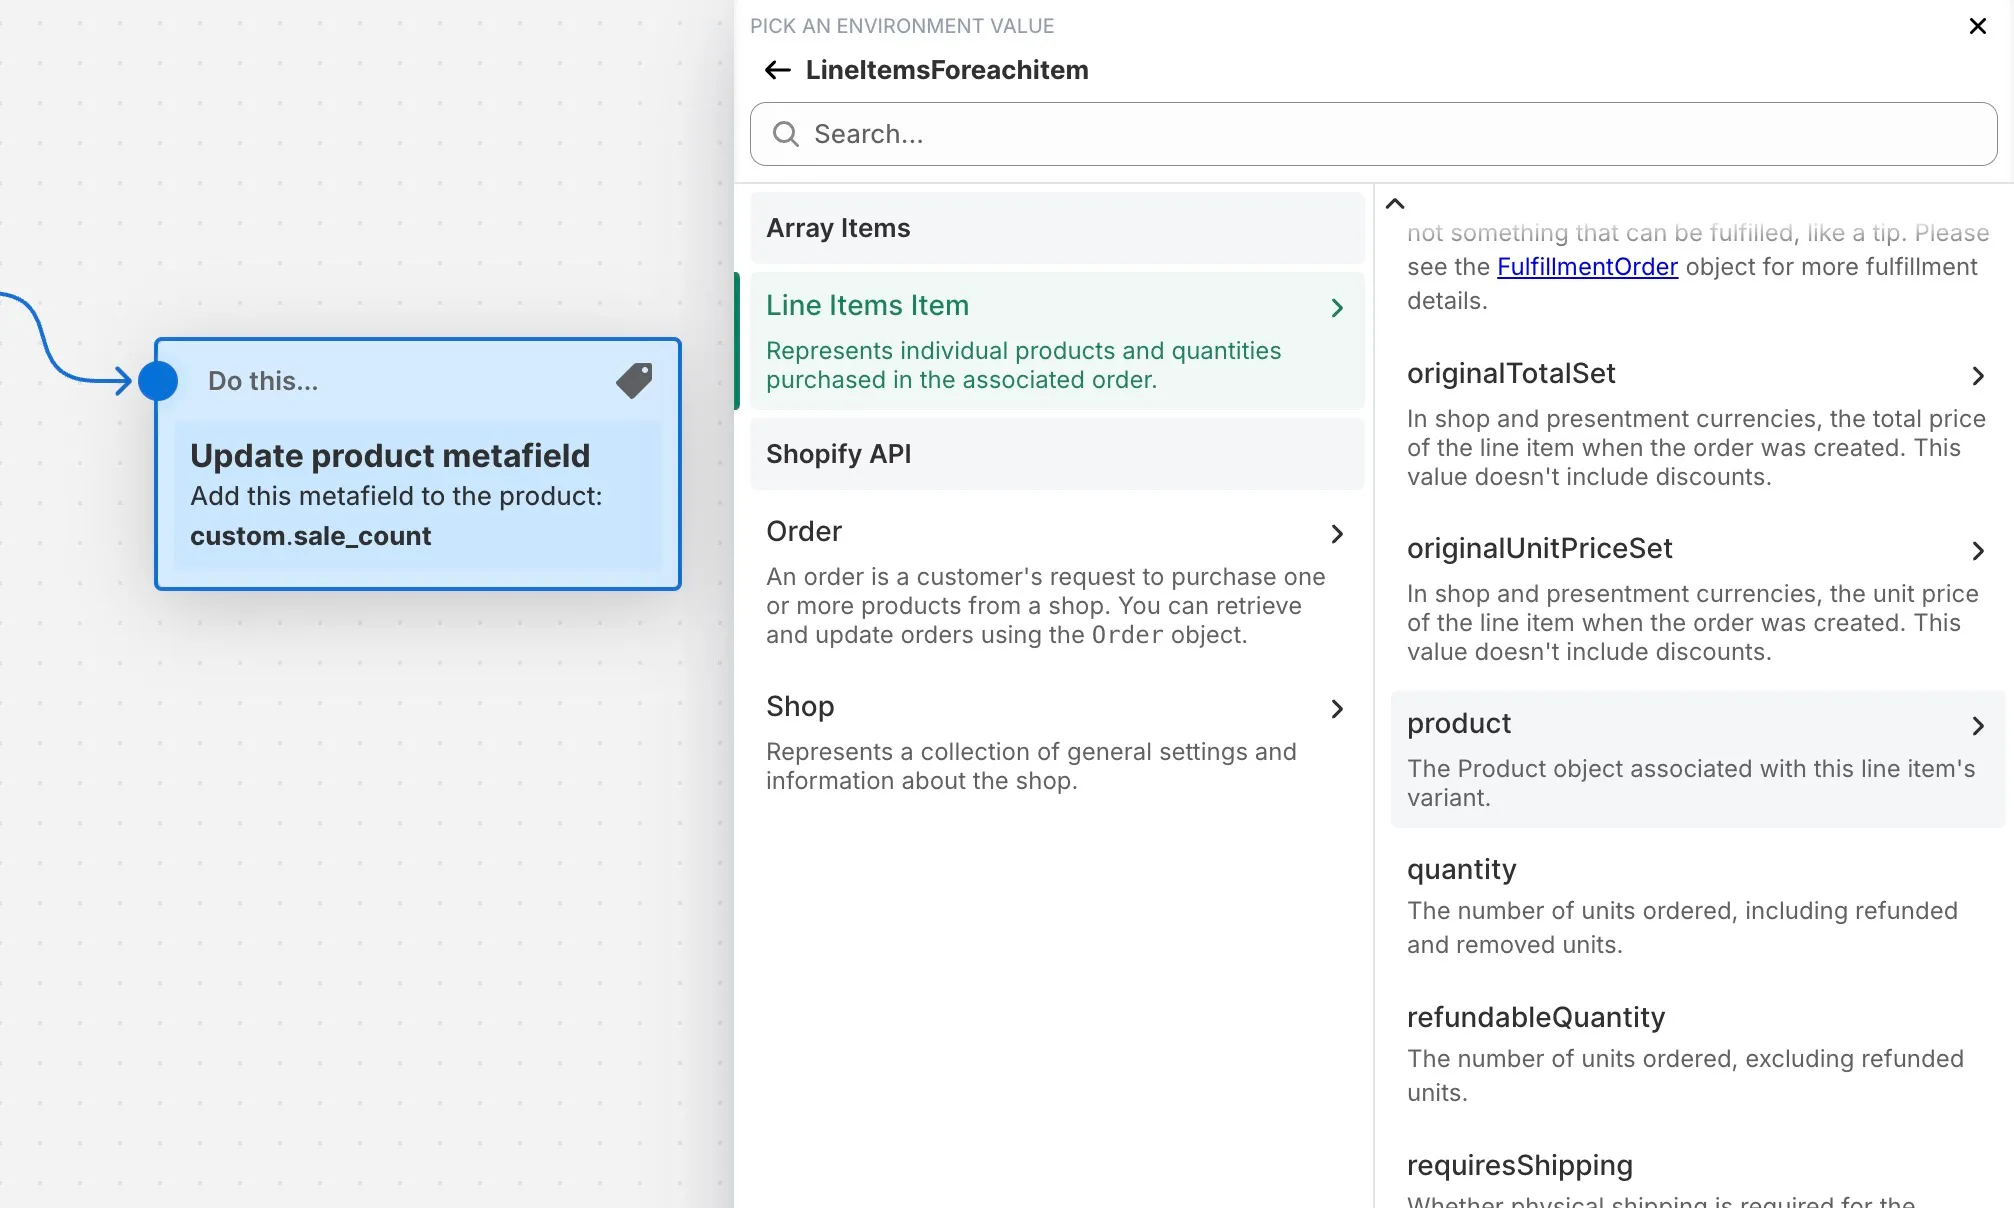
⚠️ Make sure you selected Metafield (singular) and not Metafields
Now you can select your sale count metafield. This sets up an alias - just a short name to be used in the flow.
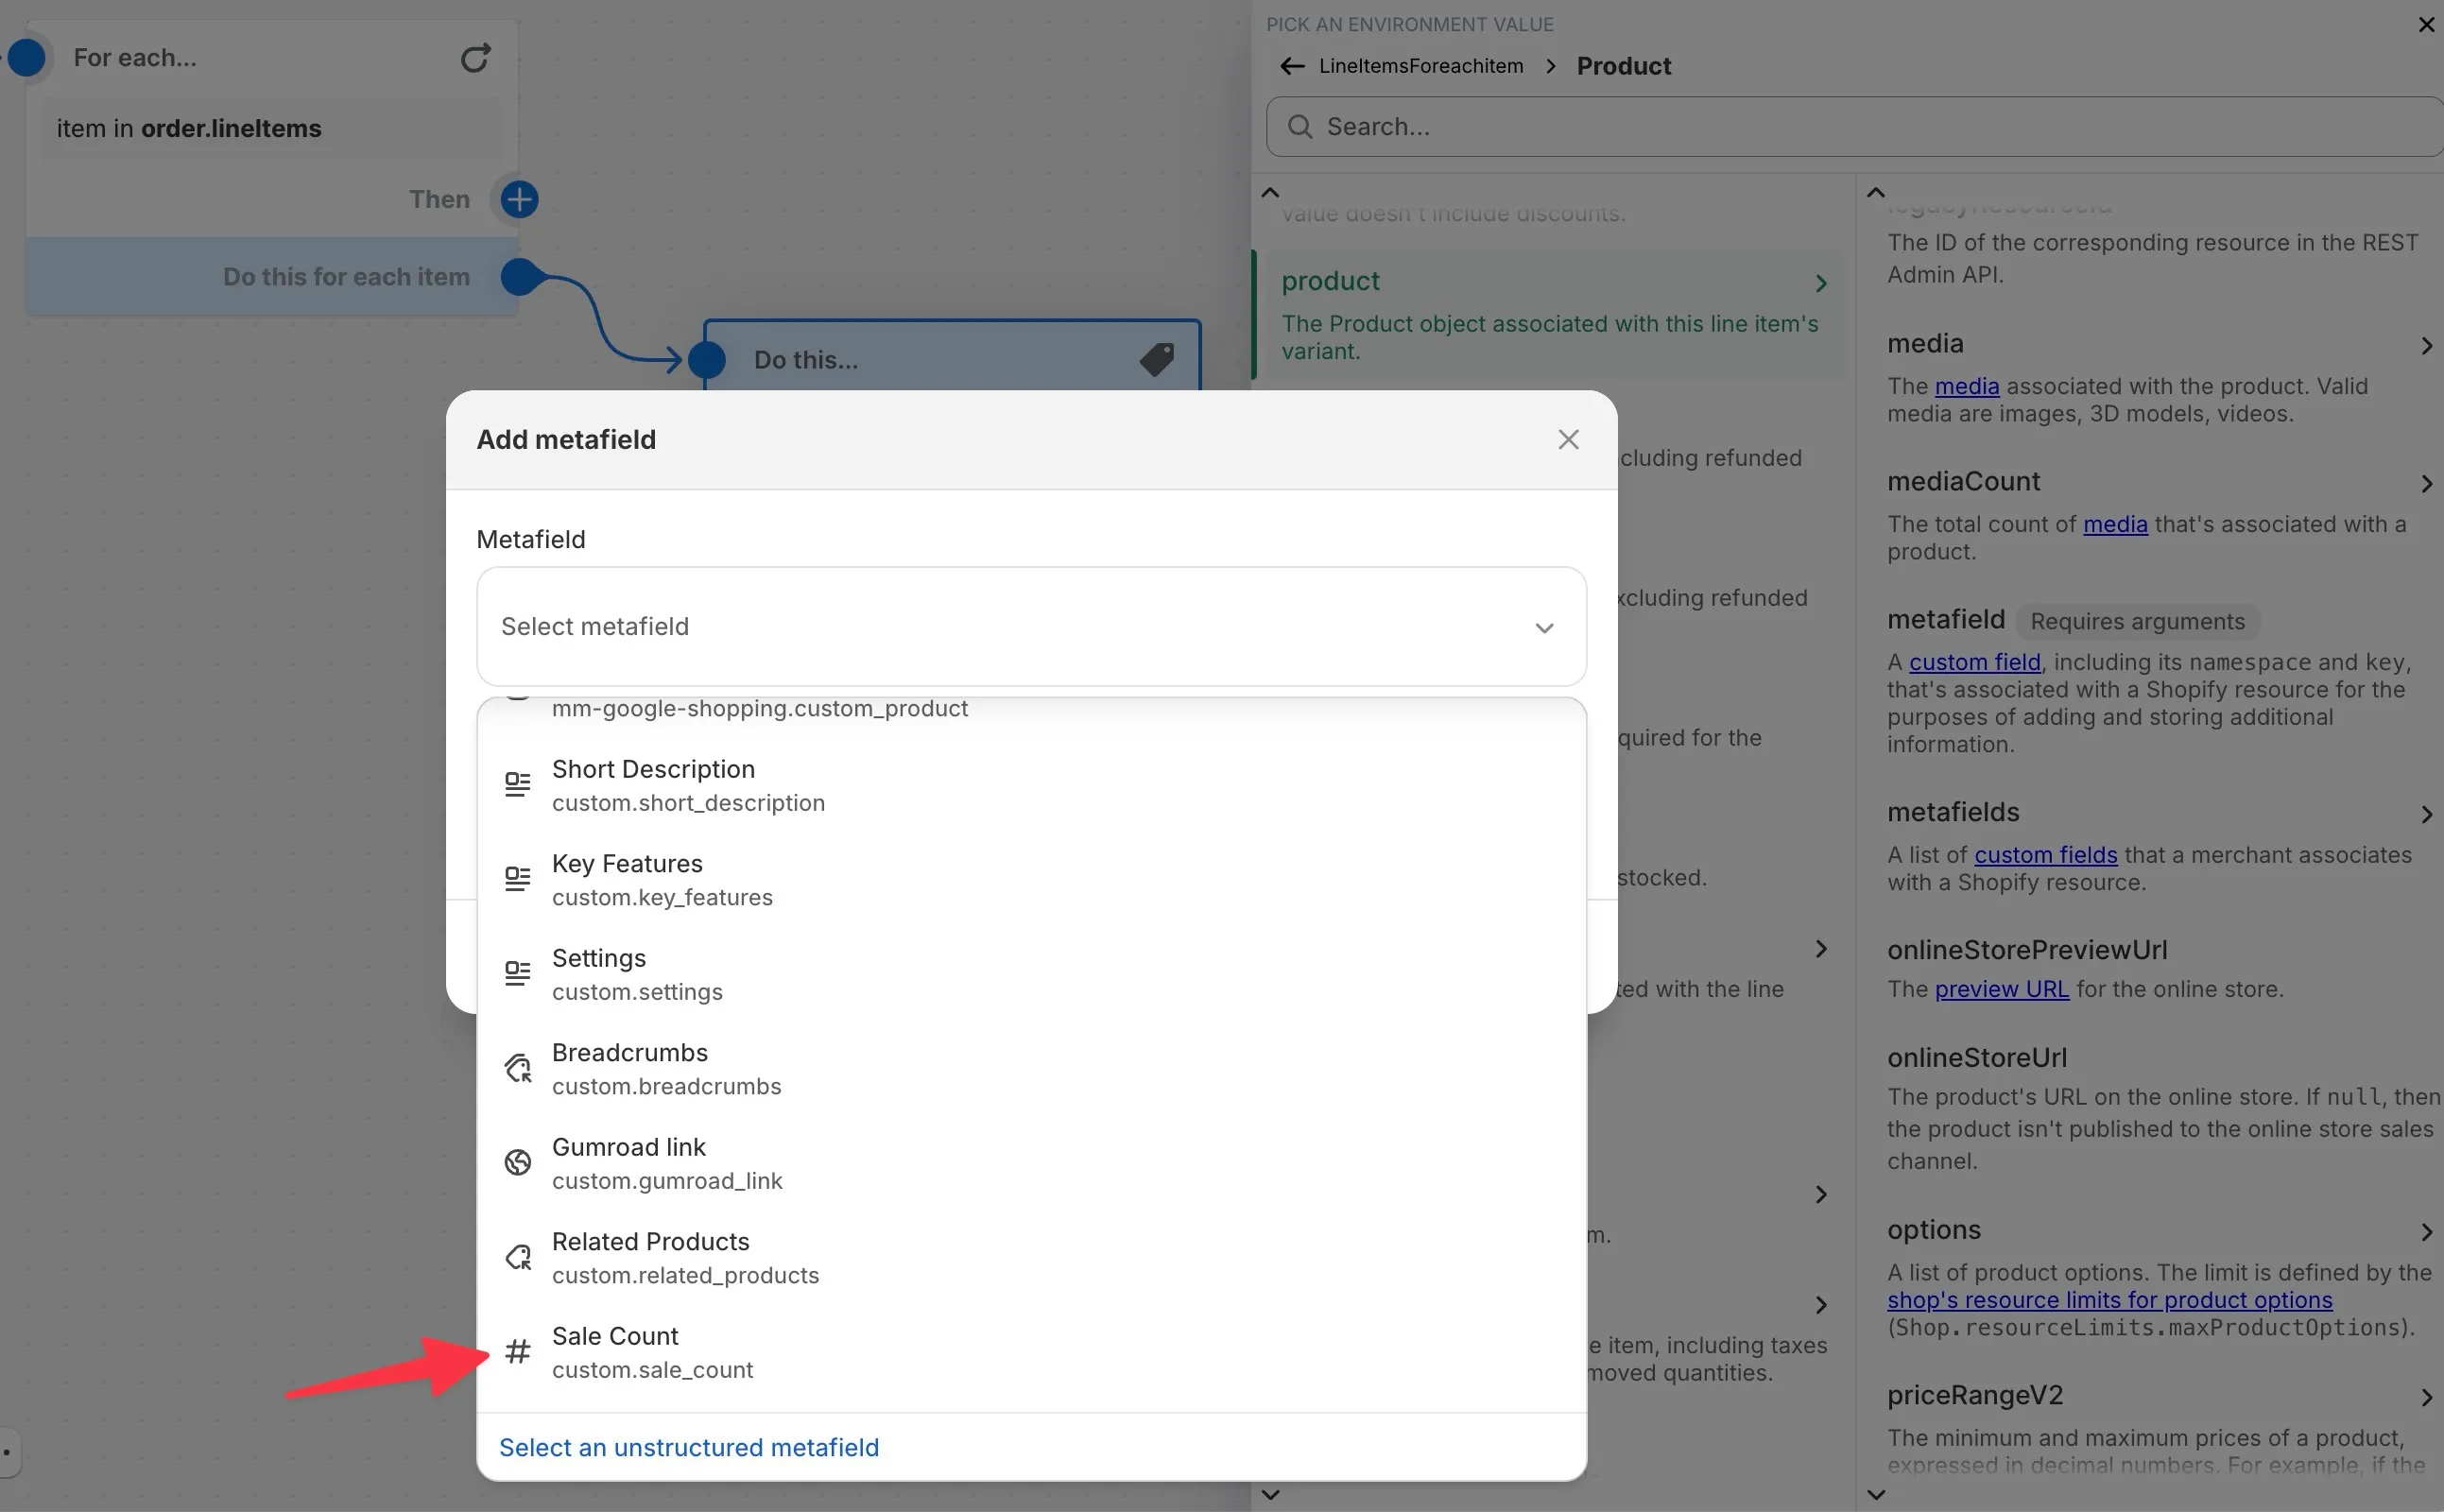
In the next screen just select “value”.

You should be back on the form now with this text in your value field:
{{lineItemsForeachitem.product.saleCount.value}}
This is just getting the current value of that Metafield. But we want to add 1 to count that sale. So we can use the plus liquid filter:
{{lineItemsForeachitem.product.saleCount.value | plus: 1}}
Here is what everything should look like:
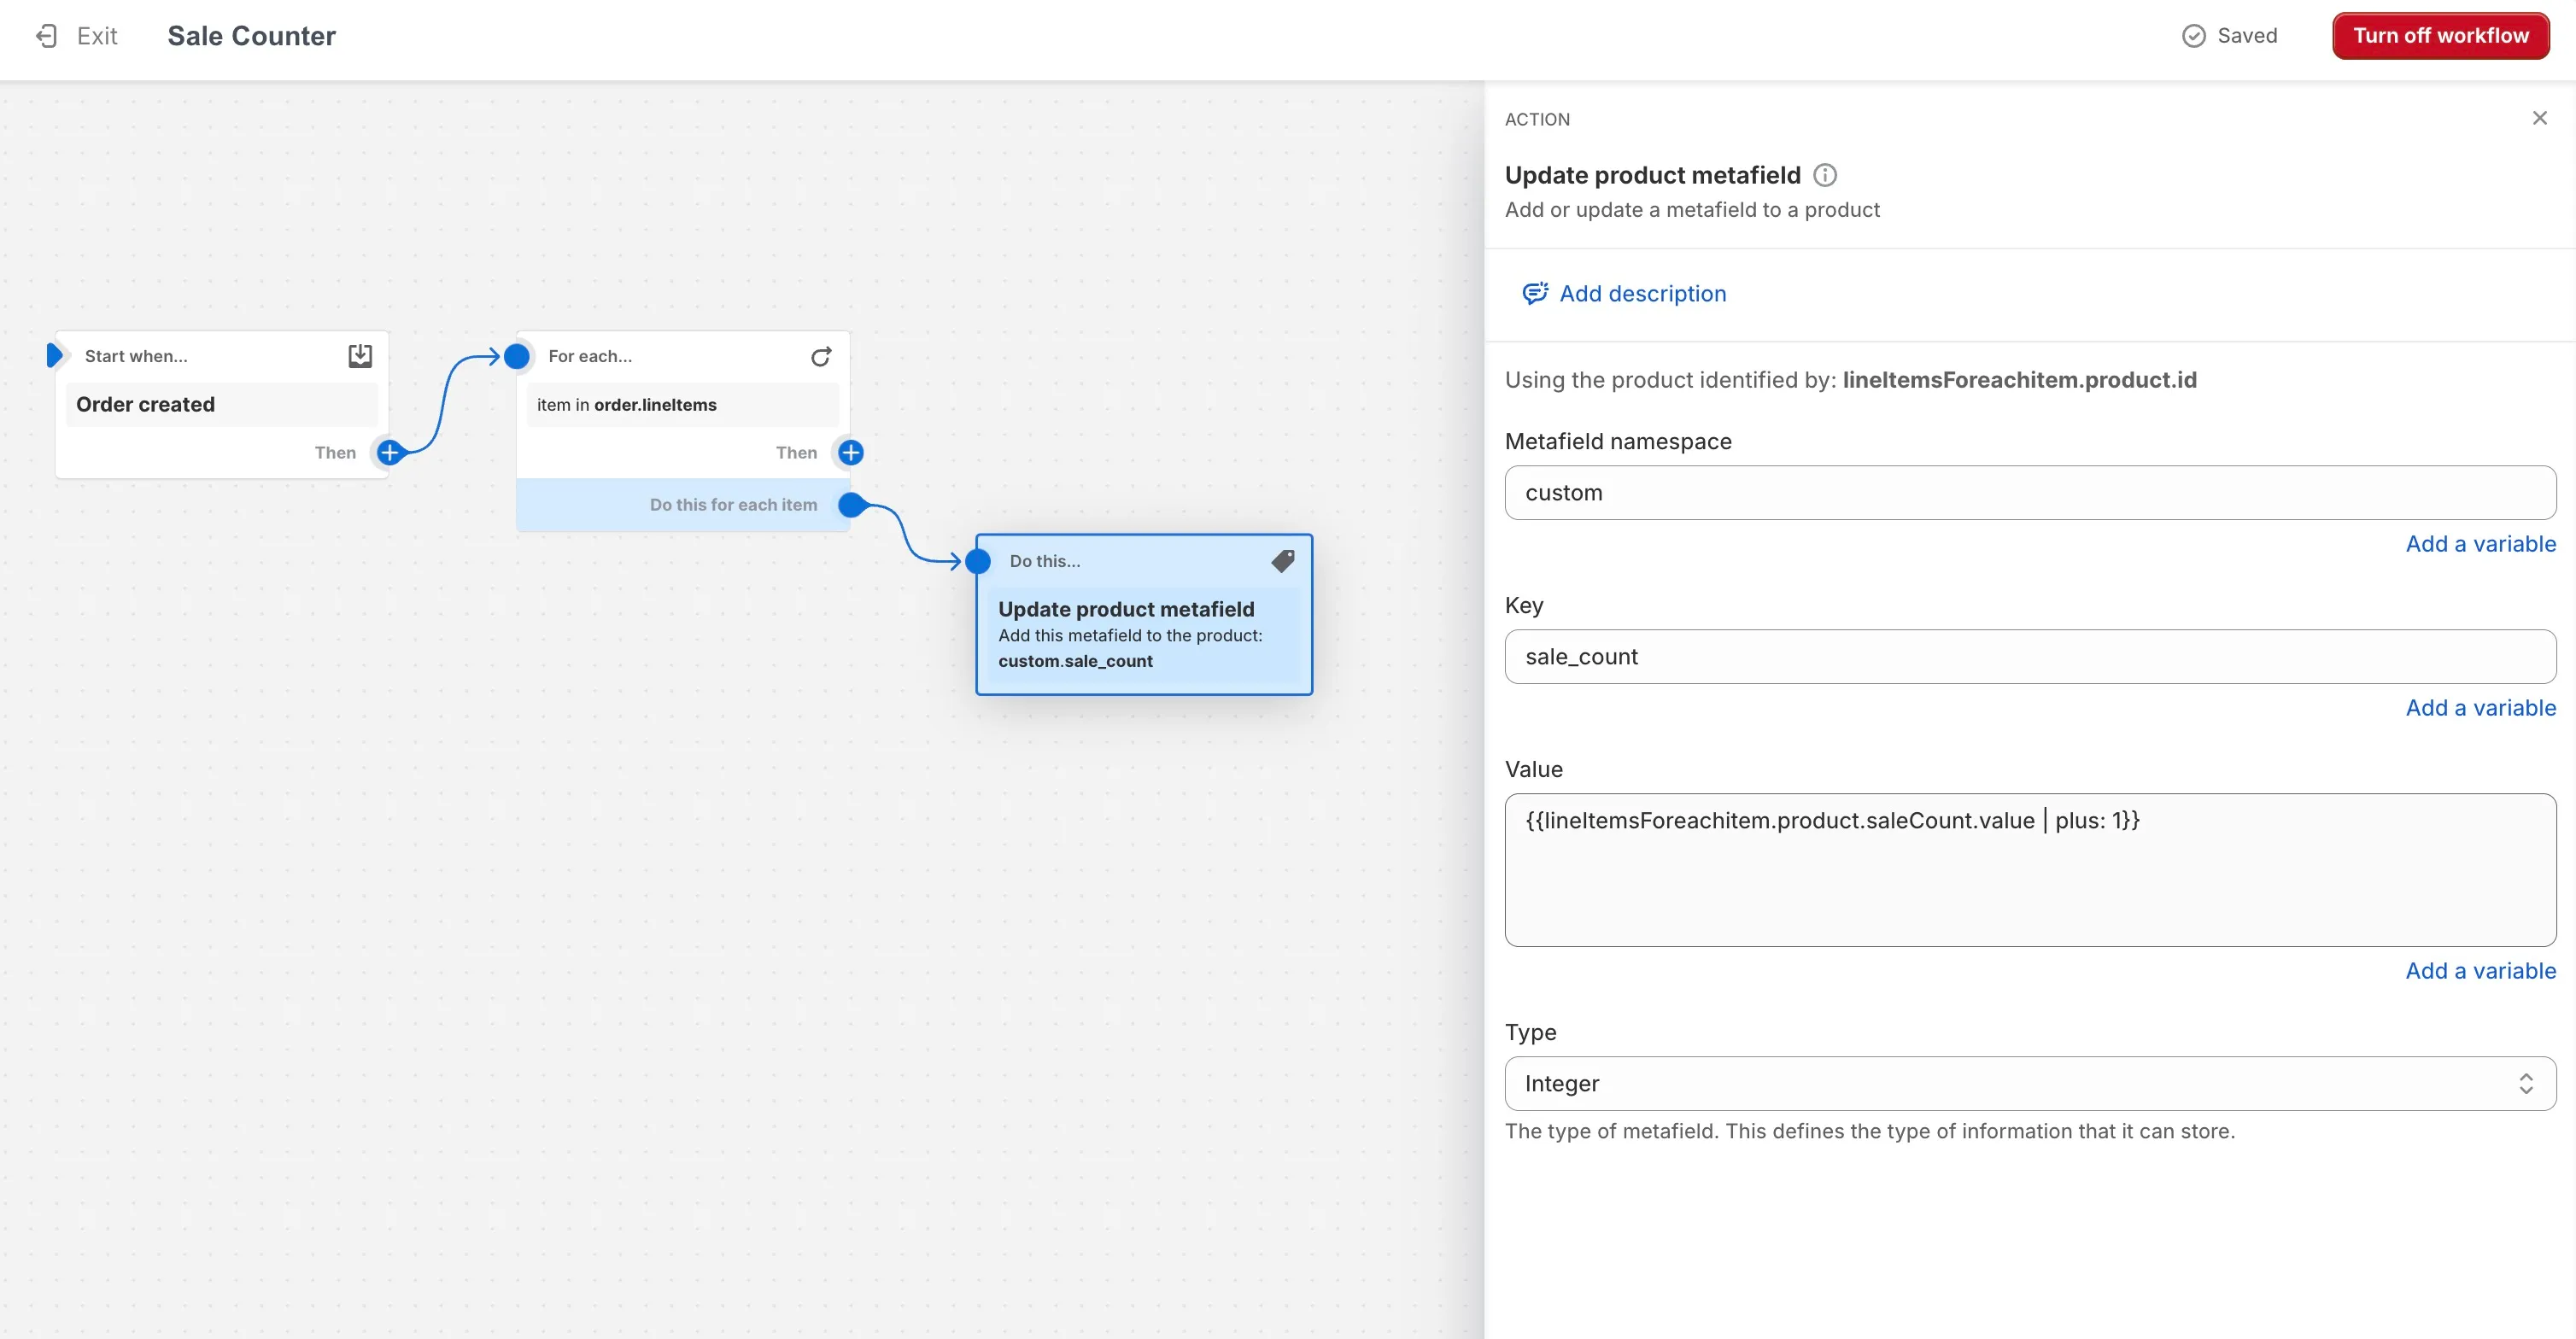
Congratulations, you’re done! Save your flow (give it a proper name like “Sale counter”) and turn on your workflow.
You can make a test order, and you should now see that your metafield is being updated whenever a product is purchased.
Need help with any of the above? Please use the form on my services page.
