If you’re confused about updating your Shopify theme, don’t worry, it’s not just you.
If you’re lucky you will see the blue dot and automatic updates are available for your theme.
But it can be complicated in these common situations:
- You made code changes to your theme.
- You installed your theme from a third party, not from the Shopify theme store.
But don’t worry, there is a process you can follow that makes updating your theme a lot easier.
Note: Updating from Vintage to Shopify 2.0?
If you are still using an older Shopify 1.0 “vintage” theme, then you should definitely update! This post is not for you.
It is definitely worth it because it is a big update to the entire Shopify platform that gives you much more control over your store.
Do you even need to update your Shopify Theme?
No, you don’t need to update your theme if you don’t want to!
This is a common misunderstanding.
It’s not the same kind of update as when you update your phone, Windows or Mac OS, or Wordpress website. Those updates usually mean better security, protection from hackers and viruses etc… They are important.
A theme in Shopify is just a design, just the front-end layer of your website. It doesn’t really affect security. So it’s not as important to regularly update.
So if you see the little blue dot that says “update available” - don’t feel pressured to update.

It’s available if you want it. You don’t have to update.
In fact, that little blue dot only started appearing around 2021.
Before that, themes would come out with updates and you wouldn’t know about it.
Stores would happily use themes for 2-3 years without updating at all!
So why update? There are good reasons of course:
Benefits of updating your Shopify Theme
You get access to all the latest features that the theme added.
You can check the release notes to see what has been changed.
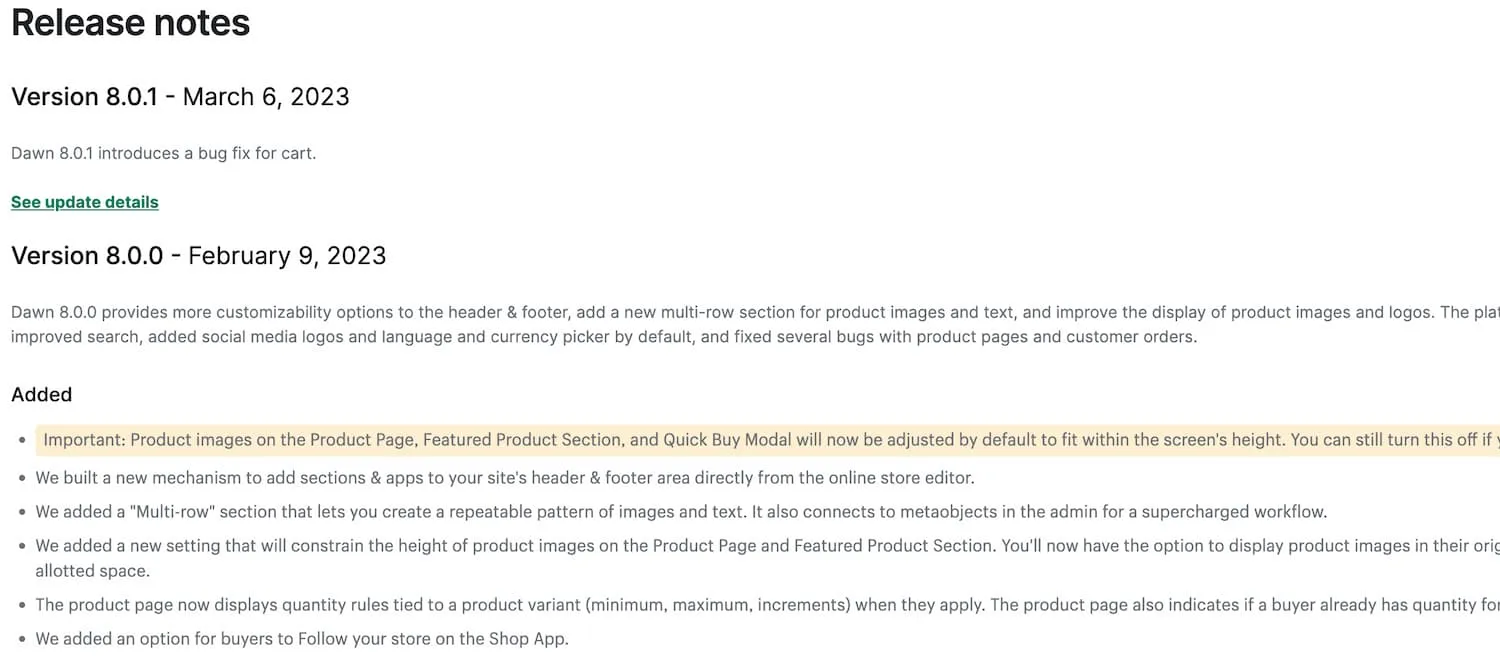
Think about if a feature will help your business - will it result in more profit? And is it worth spending your time updating?
New sections, blocks, and design options
This is the biggest reason to update your theme.
Your theme might have a new section or block type added. And there will be various additional settings for existing sections.
For example, Dawn 7.0 came out with a new “Complementary products” block for the product page. Allowing you to advertise products that go together.
Bug fixes & Improvements
There are always minor fixes for things like alignment, colors, sizes.
There are constant improvements to accessibility on different devices, and less common browsers.
Speed & SEO updates
There are always minor speed optimizations being done to themes, particularly on mobile. And SEO improvements as Google updates its guidelines and practices. These are not a big deal.
Problems with updating your Shopify theme
Updating your theme takes some time and could be confusing, depending on your situation.
If you bought your theme from the Shopify theme store and you haven’t made any code changes to it then you will be able to update with just one-click.
In this case you don’t really have any problems. It takes 10 minutes to double check everything looks good, and then you’re publishing your freshly updated theme.
If you bought your theme elsewhere, or you made code changes, it can be a bit more time-consuming to update.
Expect to spend anywhere from 1 hour to half a day if you need to move code across.
If you previously hired a developer to build something custom, you probably need to contact them again to move the custom work across to the updated theme.
So how often should you update your Shopify theme?
You should update if there is a feature on a newer version that you really want to add to your store.
Other than that, there are no rules. But I would say it’s good to update at least yearly.
You also want to pay attention to version numbers because some are more important than others.
For example, updating from Dawn 6.0 to Dawn 8.0 would be a big jump, and might be valuable to you.
Updating from Dawn 6.0 to 6.0.2 would not be a big jump. The changes there are probably so minor you wouldn’t notice them.
If you can see Theme Updates Available
If you bought your theme from the Shopify theme store you should see the option to update.

Don’t worry - your theme won’t be overwritten. Shopify adds the new version as an unpublished copy.
The new copy will have all of your sections, blocks, and theme settings exactly like on your old theme.
If you never made any code changes, then you’re done.
Just preview it to double check that it’s all good visually. And hit publish.
If you did make code changes, see below “How to update a theme with code changes”.
”Updates not supported” - manually update your Shopify Theme
If you are seeing “updates no supported” this is usually for two reasons:
1. You made code changes to your theme.
Two things can happen here:
a) You see the notification with a blue dot saying “Your theme version X.X is available”.
That means Shopify will add the new version to your store, with all your theme settings, sections, block, and content inside. Great!
However, your code changes will be missing and you need to manually copy & paste them across.
b) You don’t see any notification.
You will need to manually update (read further).
2. You didn’t get your theme from the Shopify theme store
In this case Shopify just doesn’t know where to source the latest copy of your theme.
You will need to upload the new version and then move your changes across manually - I will give you some tips below on how to do this quickly.
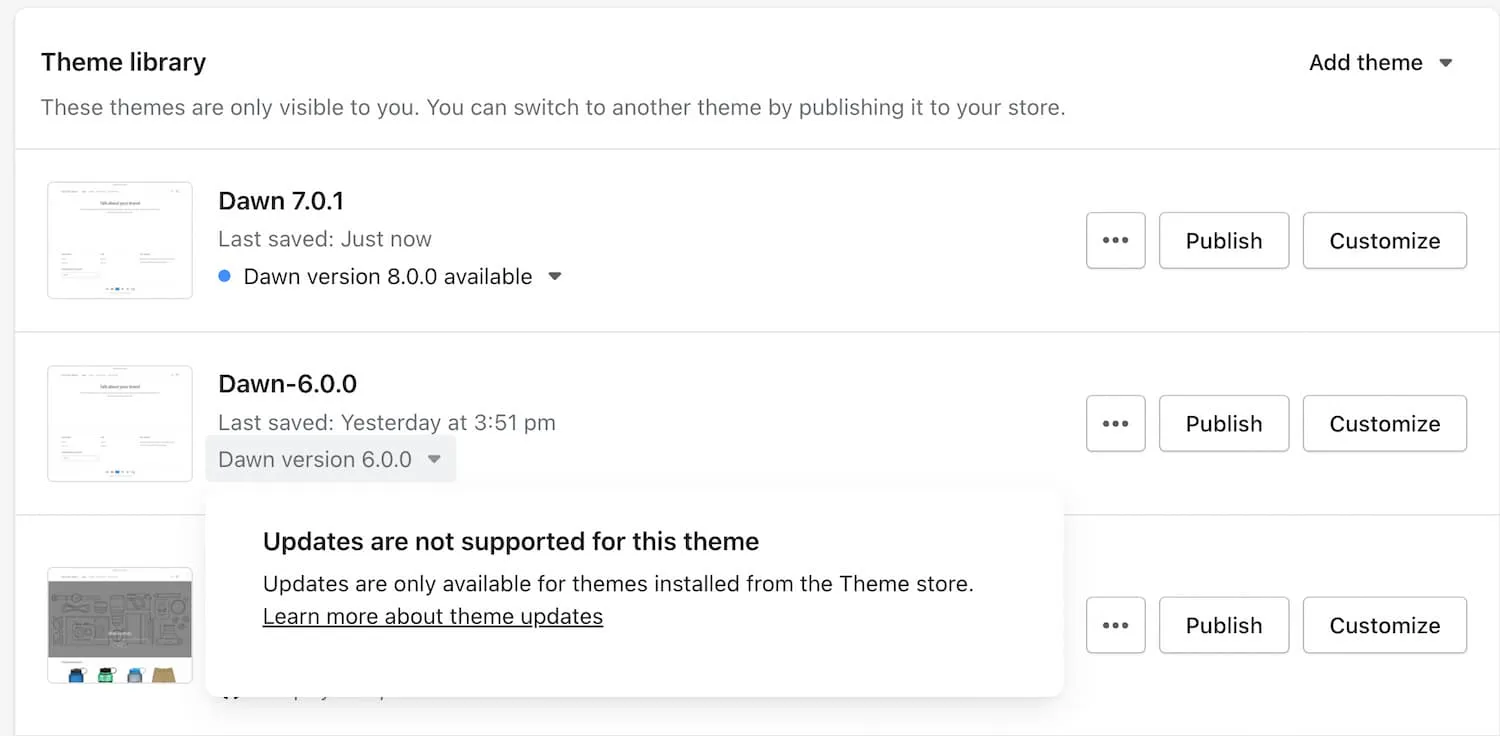
Updates not supported for Dawn 6 because I uploaded it myself from a .zip file
In this image we can see that updates are available for my copy of Dawn 7.0.1. That’s because I got it from the theme store.
We also see that updates are not supported for Dawn 6.0.0. Not because of the version, but because I downloaded it elsewhere and uploaded the theme file to my store as a .zip. This is what you do when you buy a third party theme.
In this case I need to update manually. Here’s how:
Manually updating: Save time by copying JSON template files
Any changes you make in your theme editor are stored in .json files in your theme.
That means, at least theoretically, that you can copy these .json files across to a new theme.
It doesn’t always work, but if you can do this for at least the homepage and the global theme settings, then it’s already a huge time-saver.
First open both themes in a new tab:
- Click the three dots for your old theme and right-click “Edit Code” to open it in a new tab.
- Do the same for your new theme, opening the code in a separate tab
Now that you have the two tabs side-by-side, it will be easy to copy & paste from one to the other. Just don’t mix them up!
When pasting into the new theme you will overwrite the code that’s in the .json files. That’s ok!
You don’t need to backup the code in those .json files from the new theme. It’s just the default sections and settings.
1. index.json for your home page
index.json contains all the customizations you have set up on your home page.
This includes the sections and blocks you set up, their order, and the settings you set inside each.
Go to your old theme, search ‘index.json’ and copy all the code from that file.
Now go to your new theme, find index.json, and paste over everything in there.
2. Settings_data.json for general theme settings
Important: Do not touch settings_schema.json! This contains the schema - its the file that defines which settings are available. You want the one from the new theme.
The settings_data.json contains all the settings that apply to your entire theme. Not specific pages.
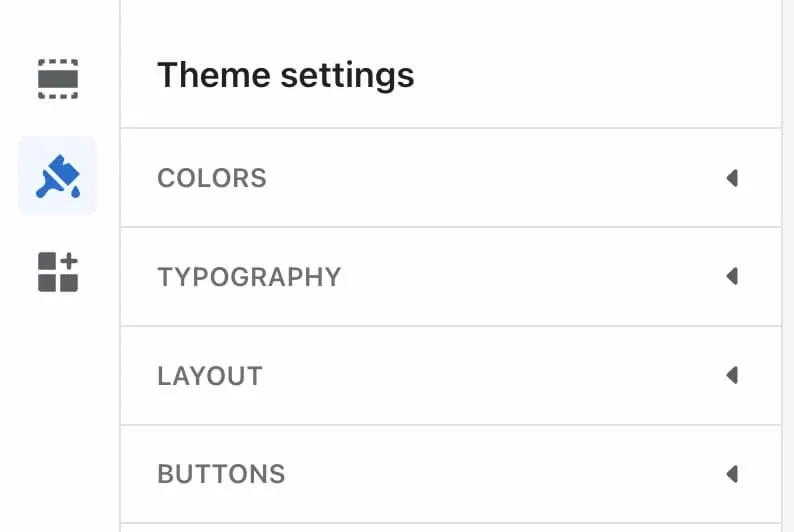
All the settings in here are recorded in settings_data.json
3. JSON for other pages
So you’ve done the home page and your global settings. This might be enough for you - you already saved time by not needing to rebuild the home page or general theme settings.
The rest of the pages usually don’t have as many settings/sections and won’t take as long. It’s always safer and easier to open up the theme customizer, and manually add the customizations.
But you might want to continue with the json method if those other pages are highly customized, and doing it manually would take a long time.
- product.json will contain your default product template
- collection.json will contain your default collection template
- The same goes for article.json, blog.json, cart.json and page.json
You might also have custom templates you created. For example, I have a product page template in my old theme called “Backpacks”.
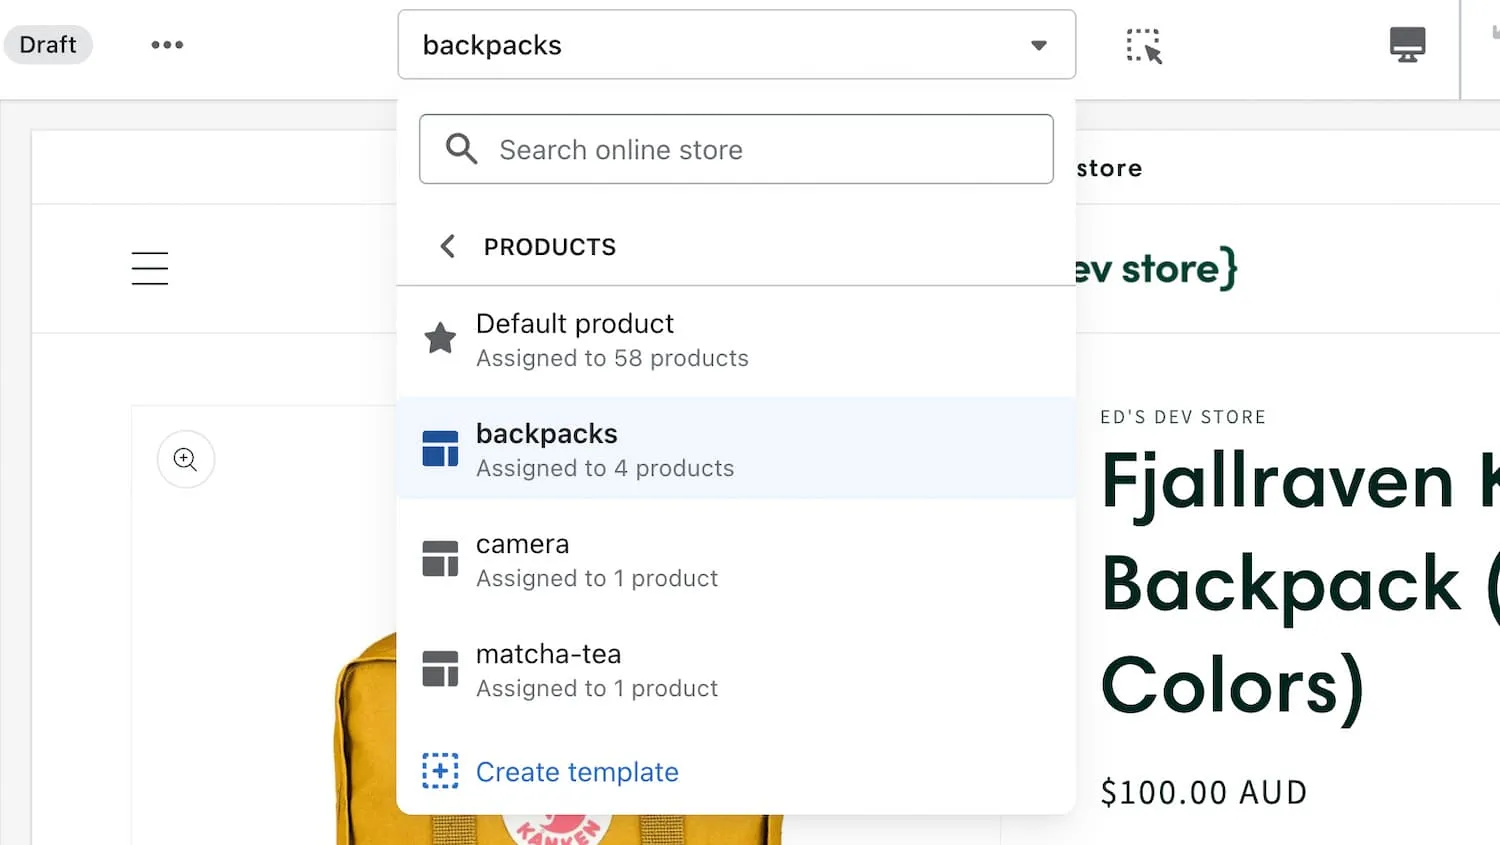
This is a highly customized product page with lots of sections. So I don’t want to manually re-create it. Here’s how to use the .json.
- In the old theme code editor, we can search for the template file “product.backpacks.json”. Copy the contents of this file.
- In the new theme code editor, scroll to the Templates folder. Click “Add new Template”.
- Give the new template the same name. Notice you don’t need to type product. at the start or .json at the end. It’s already there.
- Paste your backpacks json from the old theme into the newly created backpacks template.
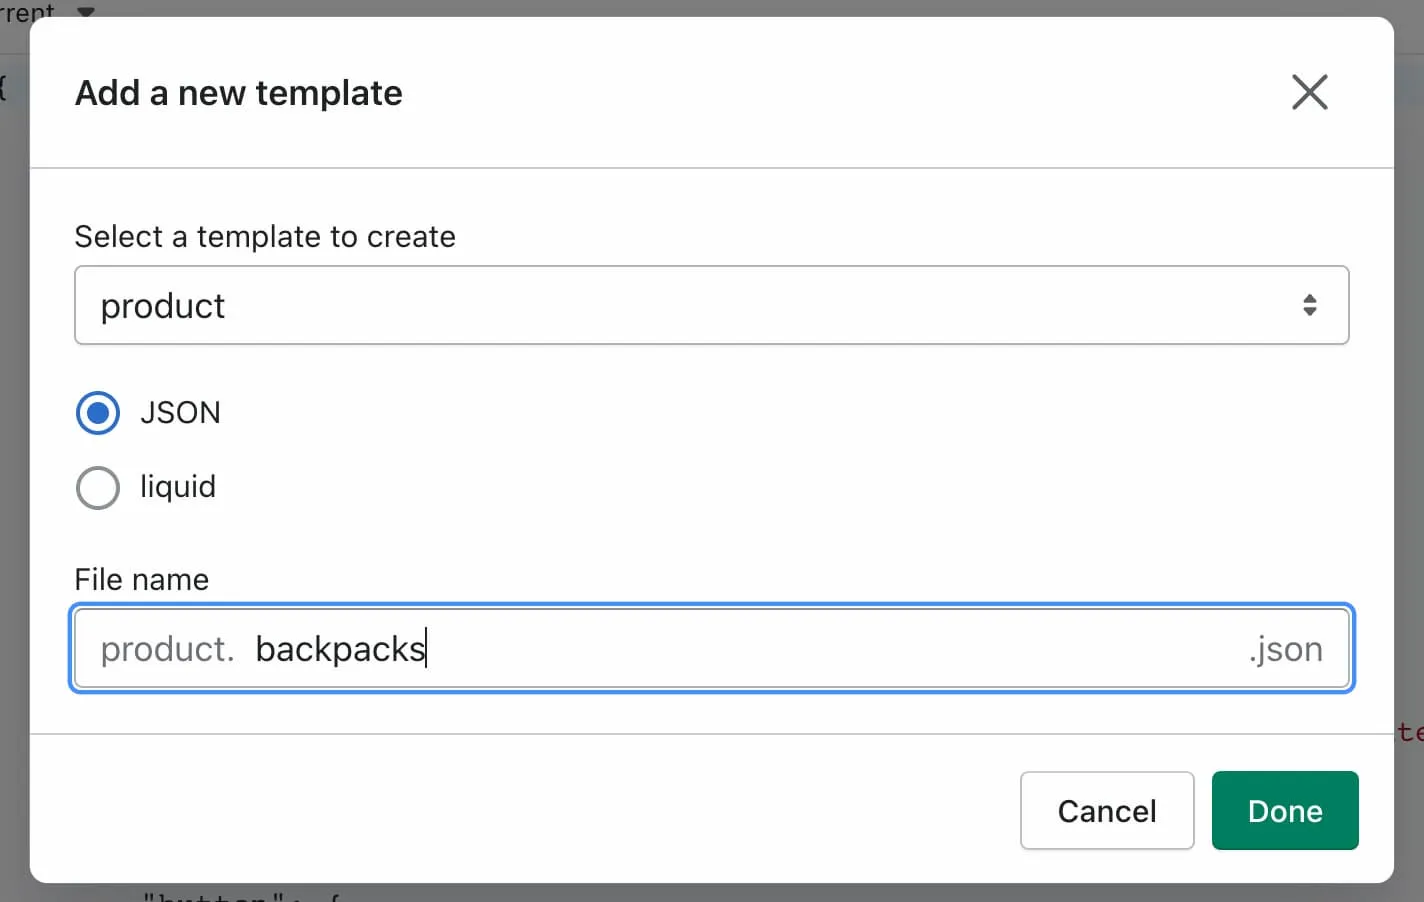
Now open your theme customizer and go to product templates. You should see the new template already there.
You would use the same process for any type of page, not just products but also collection.whatever.json or page.whatever.json.
If you get an error when saving JSON
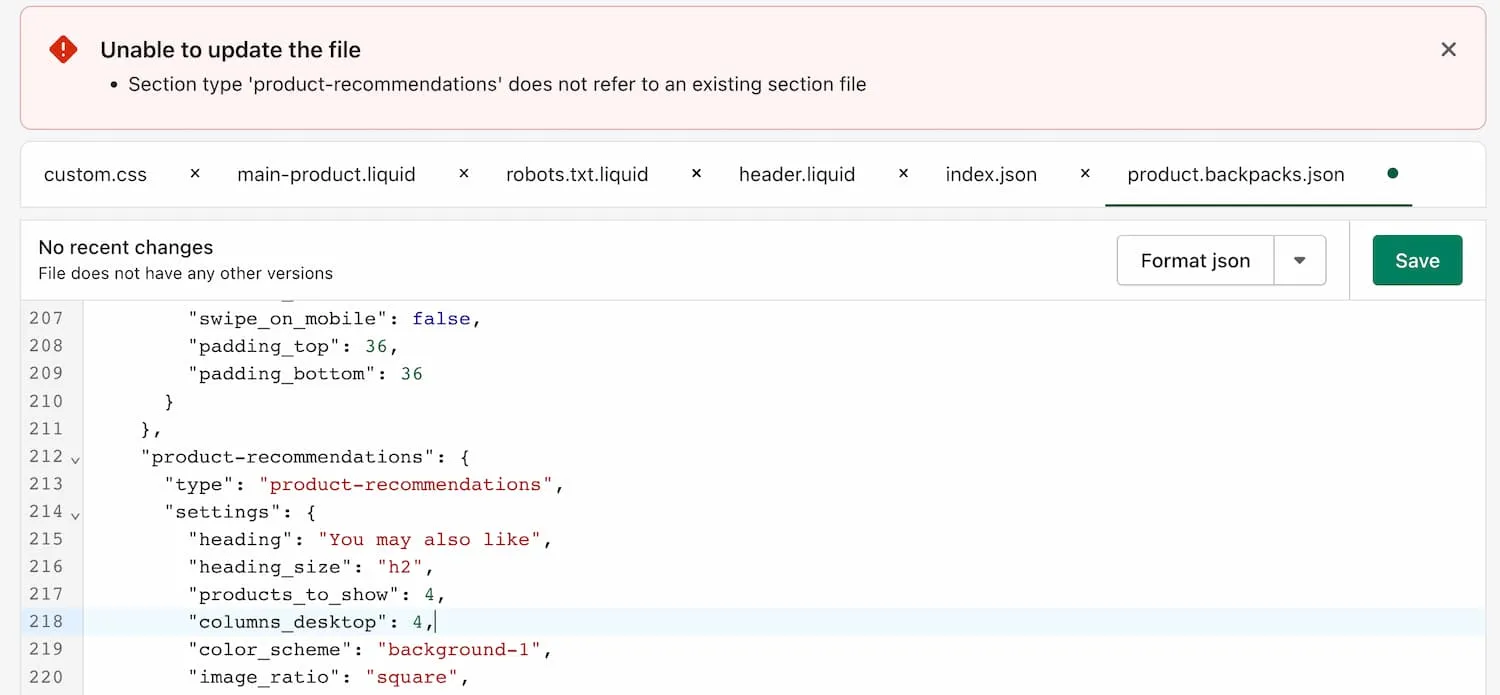
Sections might be named differently in newer versions.
If you paste some json and can’t save, you have a couple of options:
- Delete that part of the json.
As you can see in the above image, it’s having a problem with the “product-recommendations” section, which doesn’t exist in the newer theme, because it’s actually a custom section of mine.
In this case I will carefully delete the json block for that section with surgical precision, and then try saving again.
You need to understand the structure of json to do this. A wrong comma or bracket somewhere will ruin the entire page. So I don’t recommend it if you don’t understand how json works, or have poor attention to detail.
- Forget about the json for this particular template and redo it manually in the theme customizer.
If you don’t want to cause a mess, it’s safer to skip this particular template, write yourself a note that you need to redo this one in the theme customizer, and move on.
Final editing in the Theme Customizer
Copying .json files just saved you some time but now you still need to manually touch up and polish anything thats missing.
Open your old theme and new theme in two tabs side by side to compare. Check all the page types:
- Home
- Products
- Collections
- Pages
- Blogs
Browse through the new theme customizer and get familiar with the settings.
I mean, the reason you updated is to change some stuff and make your store better, right? So now is when you can truly “update” your theme.
I know many store owners that want to skip this part, which is strange because it’s the whole reason for the update.
How to update a theme with code changes
If you got your theme from the Shopify theme store, you might be able to get a newer version with all your customizations included, as described above in “One-click Update”.
But the new theme will not have any code changes you made.
If we inspect the updated theme using a developer tool like Github, we can see all our custom code has been removed:
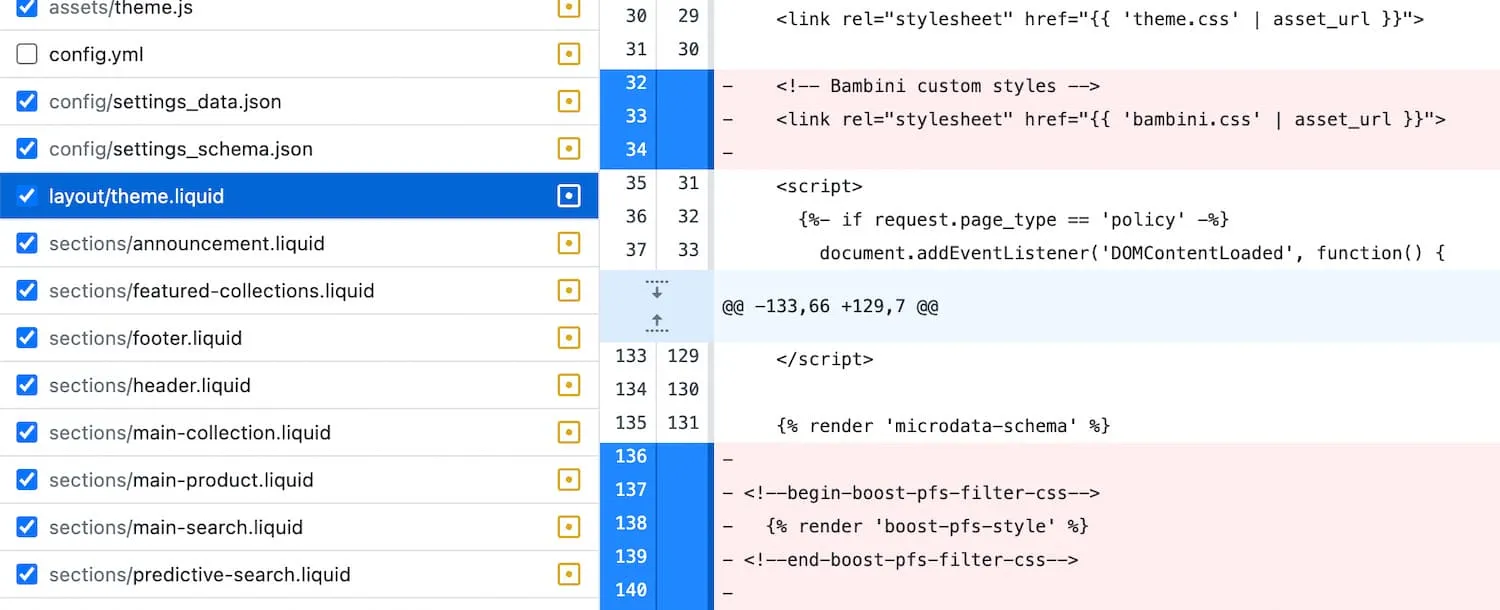
In this image I’m comparing the new and old version using Github. You can see where previously I added a custom stylesheet, and some code for the Boost Filtering app. The red highlight means that code has been removed.
So if you use Github or another version control system, you know which code changes have disappeared and you can add them back in.
However, these are tools that developers use, and as a non-tech person it’s a bit too much.
Finding small code changes
You might not have a huge amount of custom code in your theme. Maybe you just followed one of my tutorials.
In that case, it shouldn’t be very difficult to track down the changes. Try to find the tutorial again and check which files were changed.
If you don’t know exactly which files where changed, Shopify gives you a little hint.
When you enter the theme editor, small dots next to file names on the sidebar indicate you made changes.
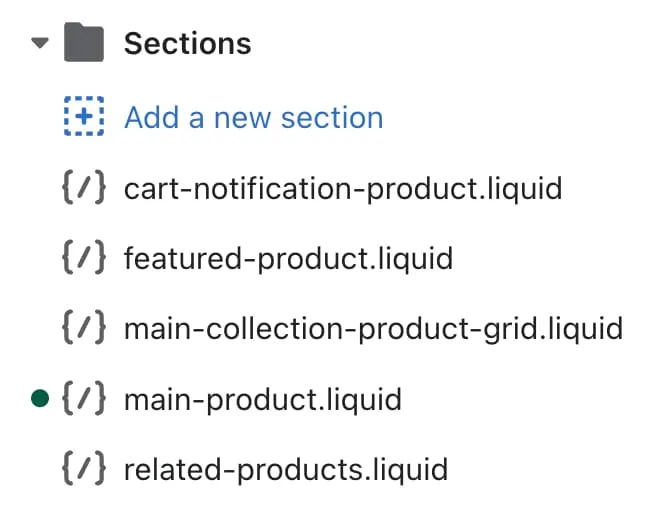
The dot indicates these have been code changes made to main-product.liquid
Look for .liquid or .css files only. You can ignore any .json files. These just store your theme editor content. Which should already be copied across.
When you enter one of these files, you should see a dropdown at the top titled “Recent changes”. This is your version history, a very simplified version of Github.
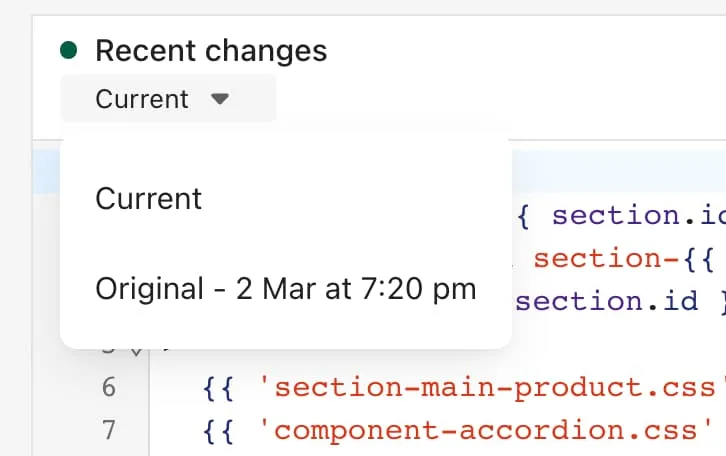
Click on Original to get the original code - don’t save! Just copy the code.
Now you can use an online diff tool like diffchecker.com to compare both versions. Paste the original into the original column, and then the current version into the changed column.

I can easily see the lines of code added using diffchecker
Now you can see the code that you need to move to the updated theme. In most cases it will be in the same spot.
Hiring a developer
The above method works if you just added some small tweaks by following a tutorial.
But if you worked with a developer previously to add some major custom features to your theme, then it’s best to contact the same developer to help with the update.
Any competent developer is using Git, and has a full project history they can check.
They will be able to assist you with the entire update. So I recommend just adding the new version to your store and then leaving the rest to them.
Another developer will also be able to work it out, but they won’t have the version history (unless you connected your store to Github on your own).
