



Quick summary:
I made a Claude Skill that turns my YouTube videos into blog posts. It downloads the transcript and thumbnail with yt-dlp, takes screenshots from the video with ffmpeg, and writes a markdown post straight into my blog’s folder. All I give it is the video URL. The skill is on my GitHub at ed-codes/youtube-to-blog, although you’ll want to write your own version.
This is one of the things AI has saved me the most time on, and I didn’t expect it to be this easy. In Claude, I type /youtube-to-blog, paste in the URL of a video and hit enter. It generates the whole blog post from there.
What the result looks like
This is a post it made from my video on the next generation of Shopify themes.
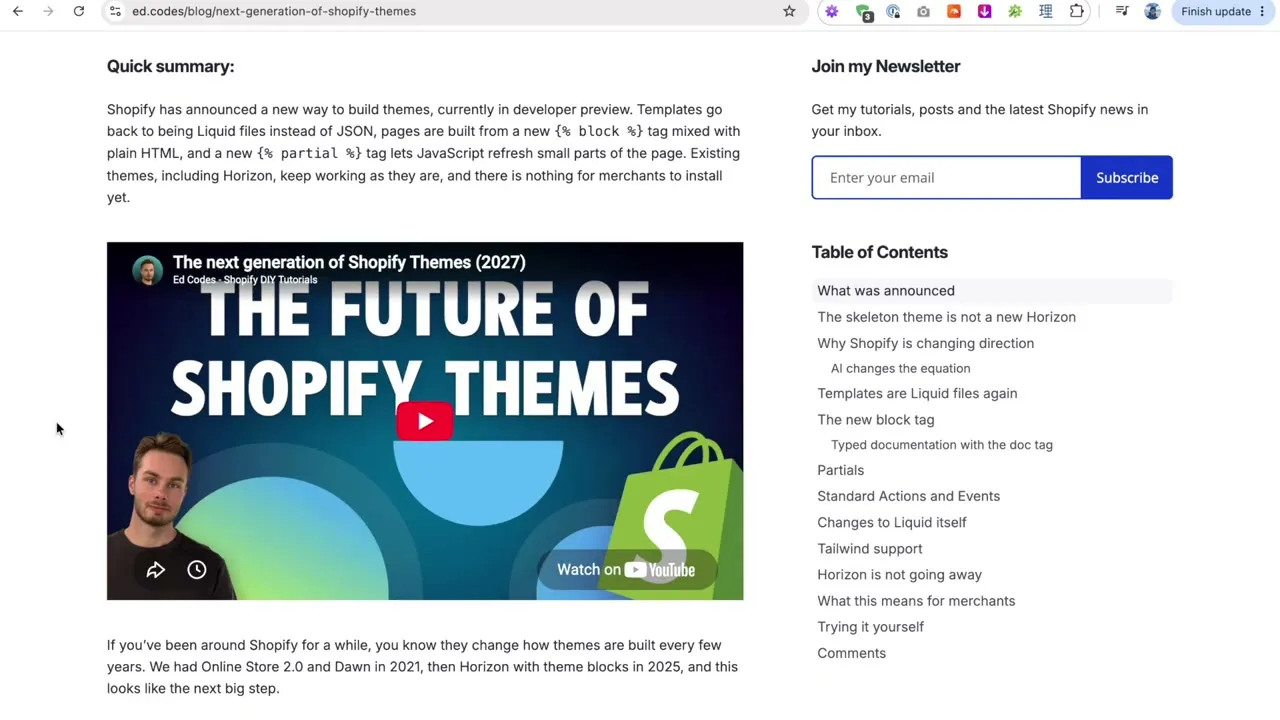
It’s a full blog post, with the video embedded at the top, followed by headings, content and screenshots. The featured image on my blog listing page is the video’s thumbnail.
The screenshots impressed me the most. Claude reads through the video’s transcript, finds the moments where I’m saying something important, and guesses that whatever I’m showing on screen at that point will make a good image for the post.
It doesn’t copy down the transcript word for word. It rewrites what I said into a properly structured article.
You can also add extra instructions after the URL. For the Shopify themes post, I told it to get extra information from the official Shopify documentation, so it worked from my transcript and the docs together. Some of the content ended up more useful and more accurate than what I said in the video. For this post, I told it to include the notes from my video description and the skill file itself.
Why turn videos into blog posts?
I used to do this manually. I’d make a video, then spend several hours writing a blog post based on what I said, because some things are better in written form. In a tutorial I’ll often share code, and people want to copy and paste it rather than type it out from a paused video. There are also links, and names of apps, settings and places that are easier to read than to catch by ear.
The biggest reason is probably SEO. When you’ve made a video and written a post on a topic, Google sees that you have authority on it and is more likely to recommend your content.
You also get people arriving from different places. Some people search on YouTube, while others search on Google, land on your blog post and then discover your YouTube channel through it.
How the skill works
The skill is called youtube-to-blog. It’s a single SKILL.md file of instructions, and you can run skills like this in either Claude or Codex.
It doesn’t need any paid tools or APIs. It uses the terminal (also called the command line) on your computer to run two free tools.
The two CLI tools
CLI tools are programs that don’t have a graphical interface like a normal app. You run them by typing text commands in the terminal, which is familiar for developers but maybe not for everyone else.
- yt-dlp is a free, open-source tool for downloading YouTube videos. It can also download the thumbnail, the description, the captions and other metadata.
- ffmpeg is a command line tool for working with video and images. The skill uses it to extract screenshots from the video.
You don’t need to learn how to use either of them, because Claude writes and runs the commands for you. You do need them installed. On a Mac with Homebrew that’s:
brew install yt-dlp ffmpegOn Windows it’s a bit different, but I recommend asking Claude to install them for you. It has access to your terminal, so it can do that itself.
Getting the transcript
YouTube has already transcribed your video for its auto-generated captions. What I didn’t realise is that you can download those captions with yt-dlp.
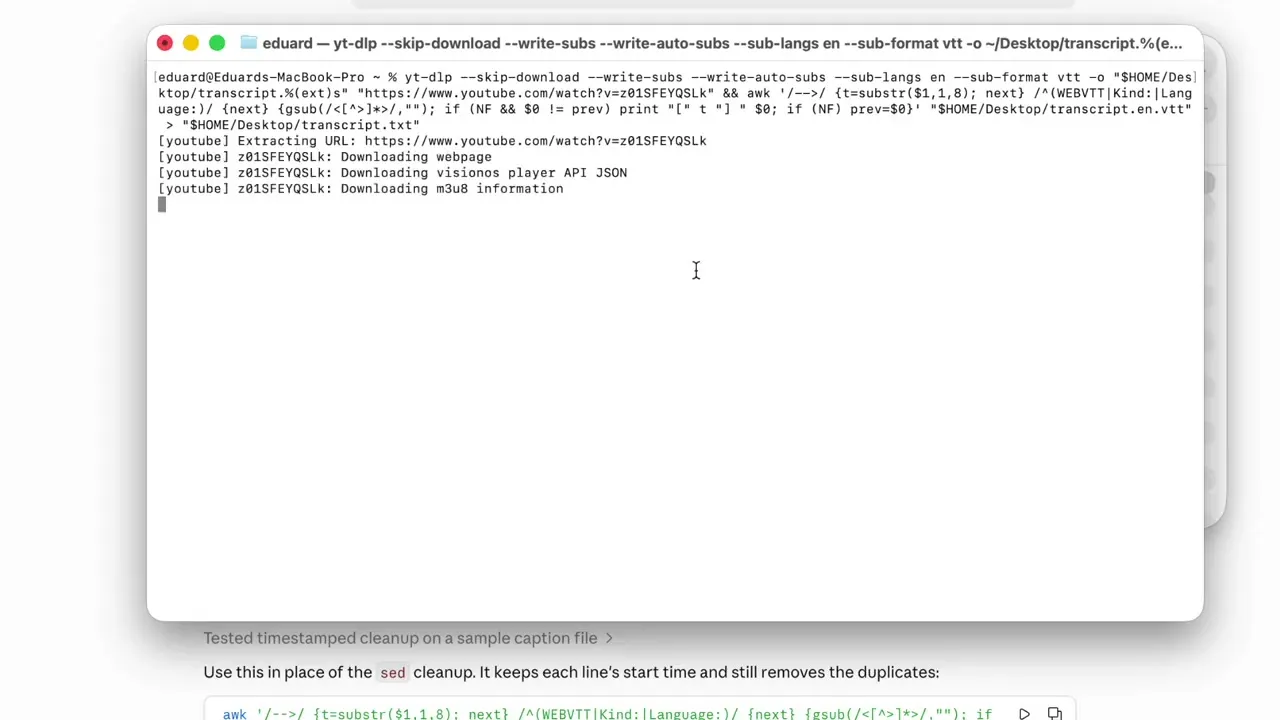
The skill downloads them in a JSON format that includes a timestamp for every line, so Claude knows what I said and when I said it. The rest of the workflow depends on this, since Claude uses the timestamps to decide when to take screenshots and writes the post from the text.
It also runs yt-dlp --dump-json to get the video’s title, description and upload date. The upload date becomes the post’s publish date.
The thumbnail
A simple curl command downloads the video’s thumbnail from YouTube to use as the post’s featured image. The skill asks for the maximum resolution version first, and if that comes back as a tiny placeholder (under 10KB) it falls back to a smaller one.
You’d get a better quality image by using your original thumbnail file instead of the compressed one YouTube serves. The only reason I download it is to make the process completely hands-free.
Taking the screenshots
This is probably the most complex part. The skill downloads the video, and then Claude goes through the transcript to choose moments for screenshots. This is the instruction in my skill:
Identify 2-4 key moments in the transcript — points where the speaker changes topic, shows something on screen, or demonstrates a step.
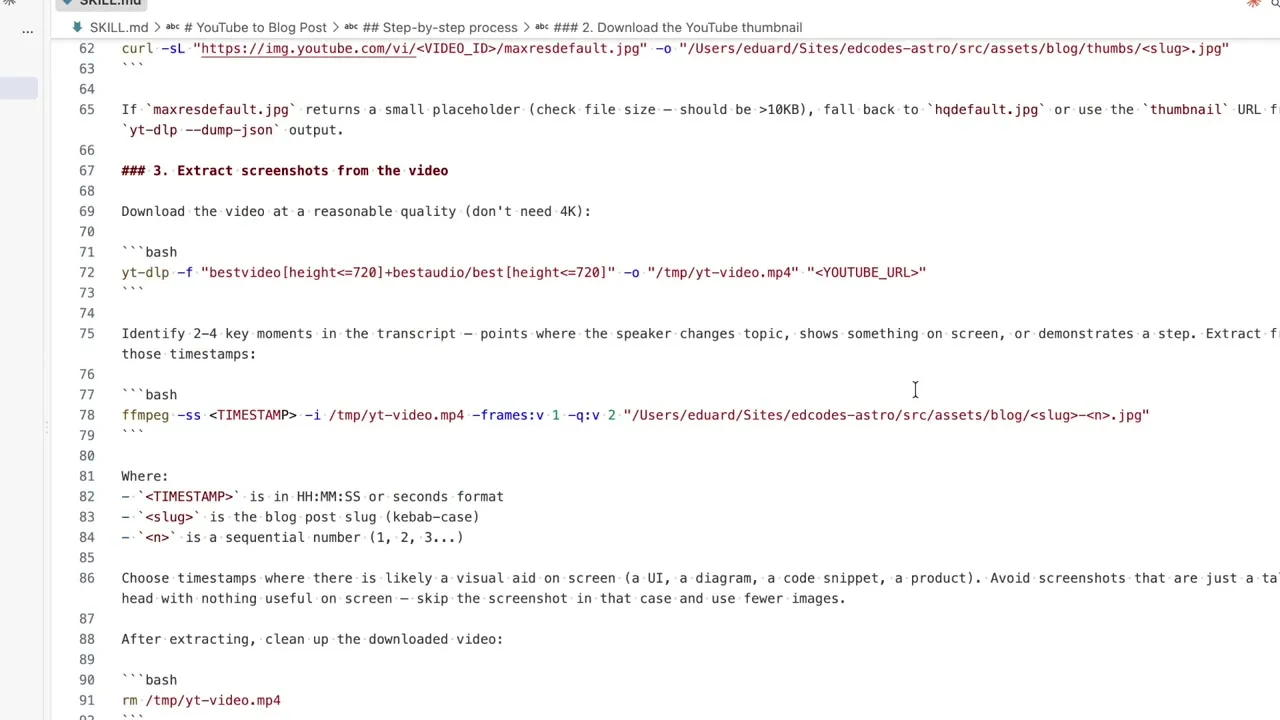
It also tells Claude to skip moments where it’s only me talking to the camera with nothing useful on screen, and to use fewer images in that case. When I was building the skill I specifically wanted it to take meaningful images, not random points in the video. If you’re building something similar, I’d include instructions like these.
ffmpeg then extracts one frame at each timestamp and saves it straight into my images folder. Once that’s done, the skill deletes the video because it doesn’t need it any more.
The screenshots aren’t the highest quality, because the skill downloads the video at 720p (1280 × 720 pixels). That’s good enough for me.
Writing the post
Next it needs to write the post in a format my blog can use. I’m lucky here, because I use Astro as my content management system and all my blog posts are markdown files.
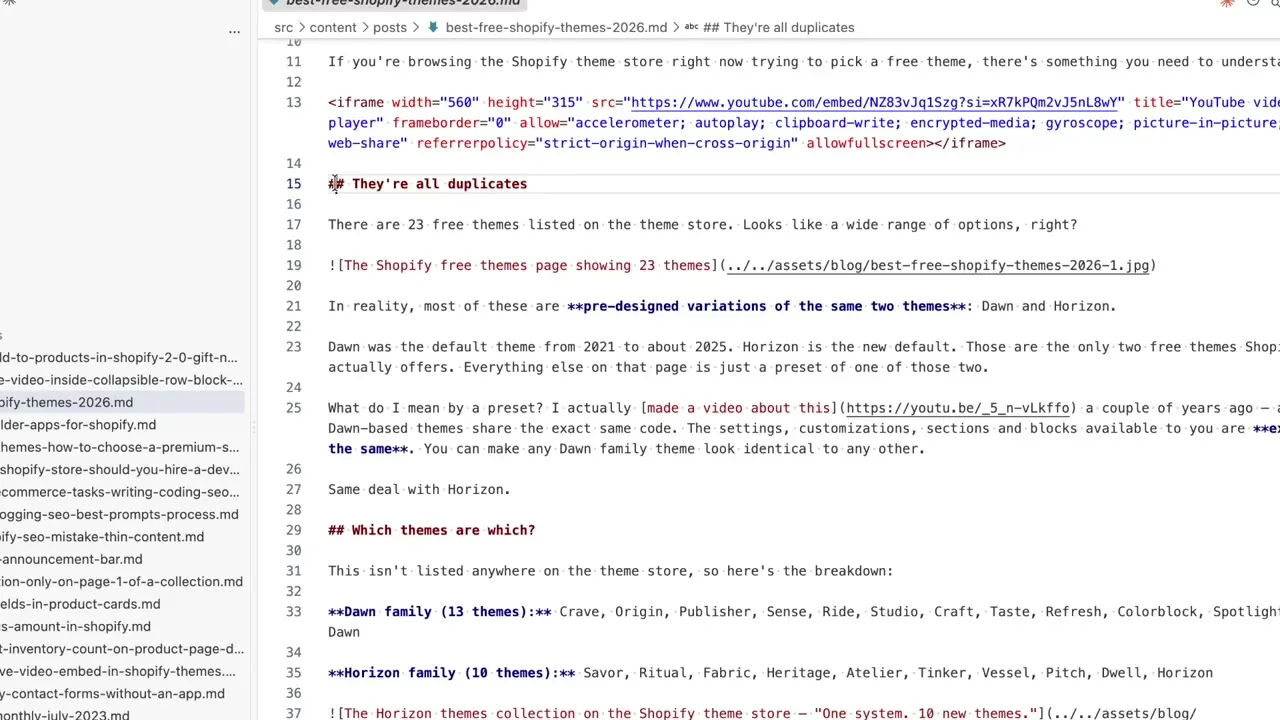
If you use AI tools you’re probably familiar with markdown already. Two hashtags make a heading, double asterisks make bold text, and an image is just a path to the file on my computer. All my posts are markdown files in a posts folder and all my images are in assets/blog. So Claude only has to create one markdown file and put the screenshots in the other folder.
The skill also spells out the exact frontmatter (title, date, author, featured image and category) and how image paths should look, so the output matches the rest of my posts.
To publish, I commit the changes and push to GitHub, and my website updates. That’s the advantage of Astro, since it’s just files on my computer.
If you’re using WordPress or another CMS, this part is more difficult. You’d need to use your platform’s API to upload the post.
Keeping it from turning into AI slop
The rest of the skill is about how the post should be written. For example, the word count target says to aim for 800 to 1,500 words for typical videos under 10 minutes, but to let the content dictate the length and not pad. I think that’s the most important instruction for stopping AI from producing slop.
Most of the file is a writing voice section. It includes:
- A description of how I write — direct, first person, practical, with no marketing lingo.
- A banned list of words and phrases that read as AI-generated, such as “leverage”, “streamline” and “let’s dive in”.
- A rule against dramatic one-line paragraphs and sentence fragments, which AI tends to fall into.
- An instruction to read 2-3 of my real posts before writing anything. The rules alone weren’t enough, and drafts that followed them still came out sounding like a generic tech blogger.
After writing, it checks its own work: that the frontmatter is valid, that every image path points to a real file, and that nothing from the banned list slipped through. Then it tells me to review the draft before publishing.
The reason I do all this, instead of simply asking AI to generate blog posts, is that these posts are based on content a human made. It takes my actual thoughts, my opinions and the structure of my video and cleans them up. In my opinion that’s fundamentally different from generating a blog post from nothing.
Making your own version
My skill is on GitHub at ed-codes/youtube-to-blog, but you won’t be able to use it exactly as it is. I wrote it for my own writing style and for Astro. You’ll need to change:
- File paths for where your posts and images are saved
- Frontmatter to match your blog platform
- Image references so the paths work on your site
- The writing voice section, replaced with your own style rules
- Word count targets, if you want longer or shorter posts
The important parts stay the same: use yt-dlp to download the transcript, write the post based on that transcript, and take screenshots based on when certain things are said.
To install it, put the folder with your SKILL.md file into ~/.claude/skills/, or upload it as a zip in the Claude desktop app under Customize > Skills. I went through the upload steps in my theme modifications post. Once it’s installed, type /youtube-to-blog and paste in your video URL. You can also give it a target keyword, a working title or a category, and it will use them.
And if you’re looking for a new CMS and want to move away from the complexity of WordPress, I highly recommend checking out Astro. It’s just flat files on your computer.
If you build your own version, let me know how it goes. See you in the next one!
Ed